


Valorant: 8 Best Brimstone Smokes for Bind
Bind is one of Valorant’s most unique maps, featuring teleporters that open up creative rotation opportunities and fast-paced gameplay. With its straightforward layout and two compact bombsites, controlling sightlines is key to securing rounds. This is where Brimstone, one of the game’s premier Controller agents, truly shines.
Brimstone’s precision smokes make him an ideal pick for Bind. His ability to quickly cut off key angles and deny enemy vision allows his team to execute plays or defend sites with ease. Whether you’re attacking or holding your ground, knowing where to place Brimstone’s smokes can make all the difference.
In this guide, we’ll walk you through the 8 best Brimstone smoke setups for Bind to help you control the map and dominate your matches. Let’s get started!
#8: Attacking A Site From Shower
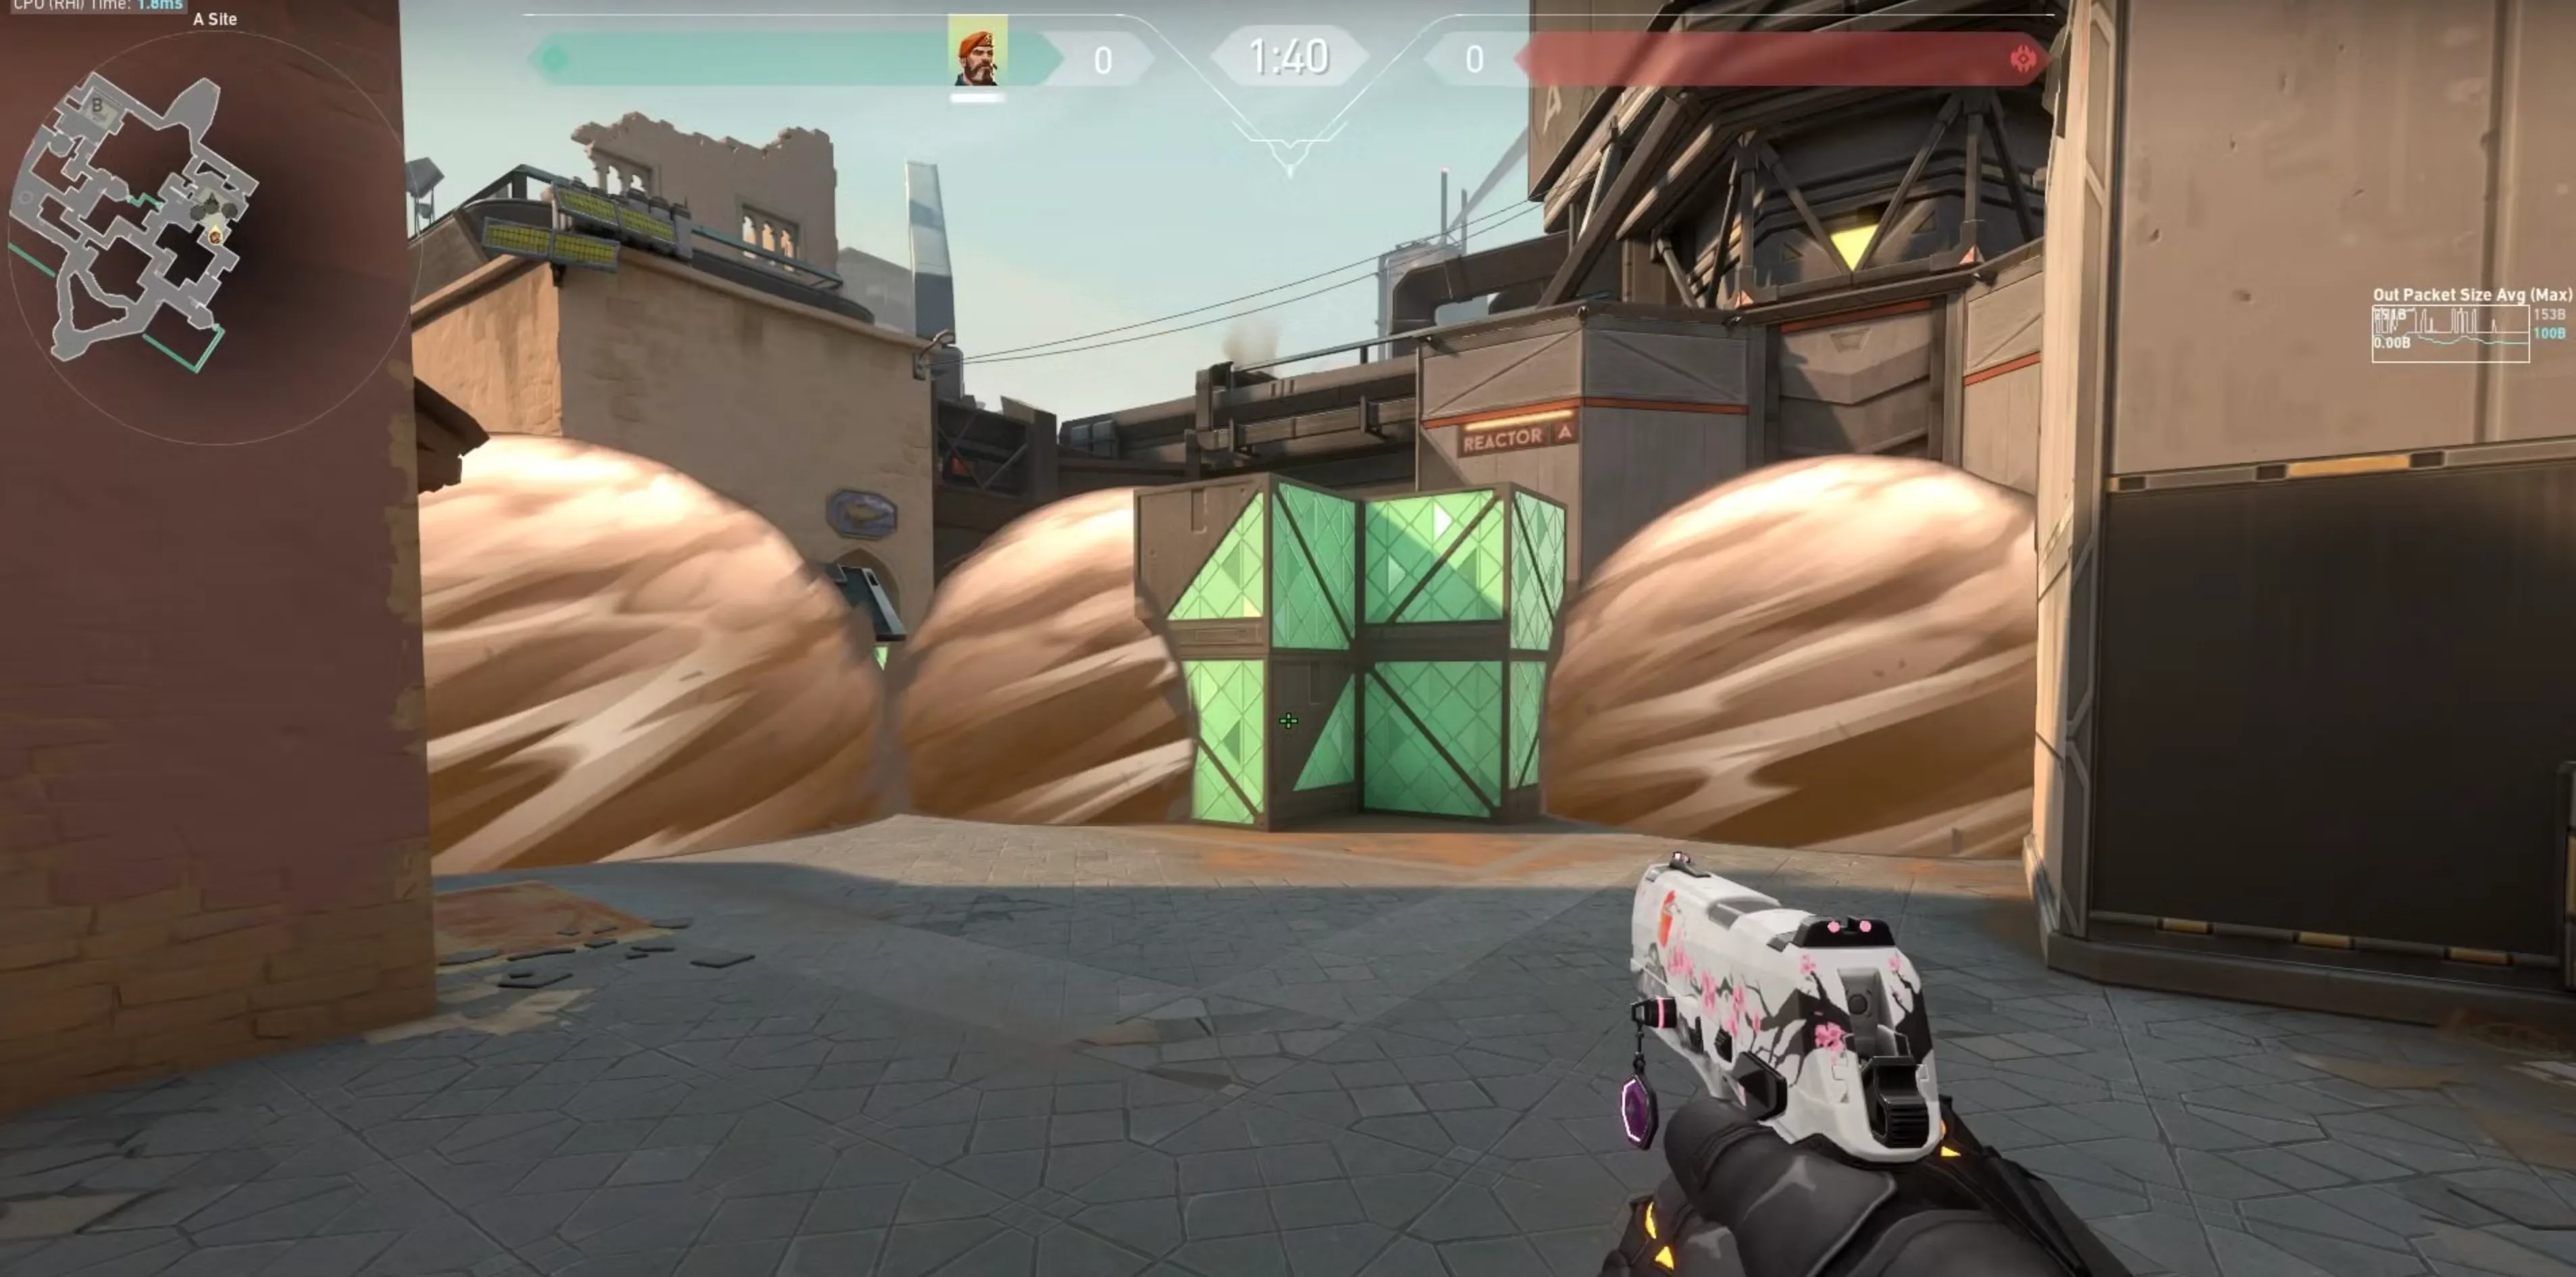
Pushing A Site through Shower is a great way to pressure defenders and force them into close-quarters engagements to contest the Spike plant. This smoke setup focuses on securing a smaller portion of the site, making it easier to plant safely, especially when the defending team is already down a few players. However, it’s important to avoid rushing in blindly and running into defensive utility.
If planting the Spike is your main objective, combine these smokes with a Sage Wall to create a nearly impenetrable setup. To execute this strategy, place two smokes to block off Defender Spawn and Heaven, while a third smoke cuts off Short and Lamps. This combination limits the defenders’ sightlines and allows your team to plant with confidence, gaining an advantage for the post-plant scenario.
#7: Attacking B Site
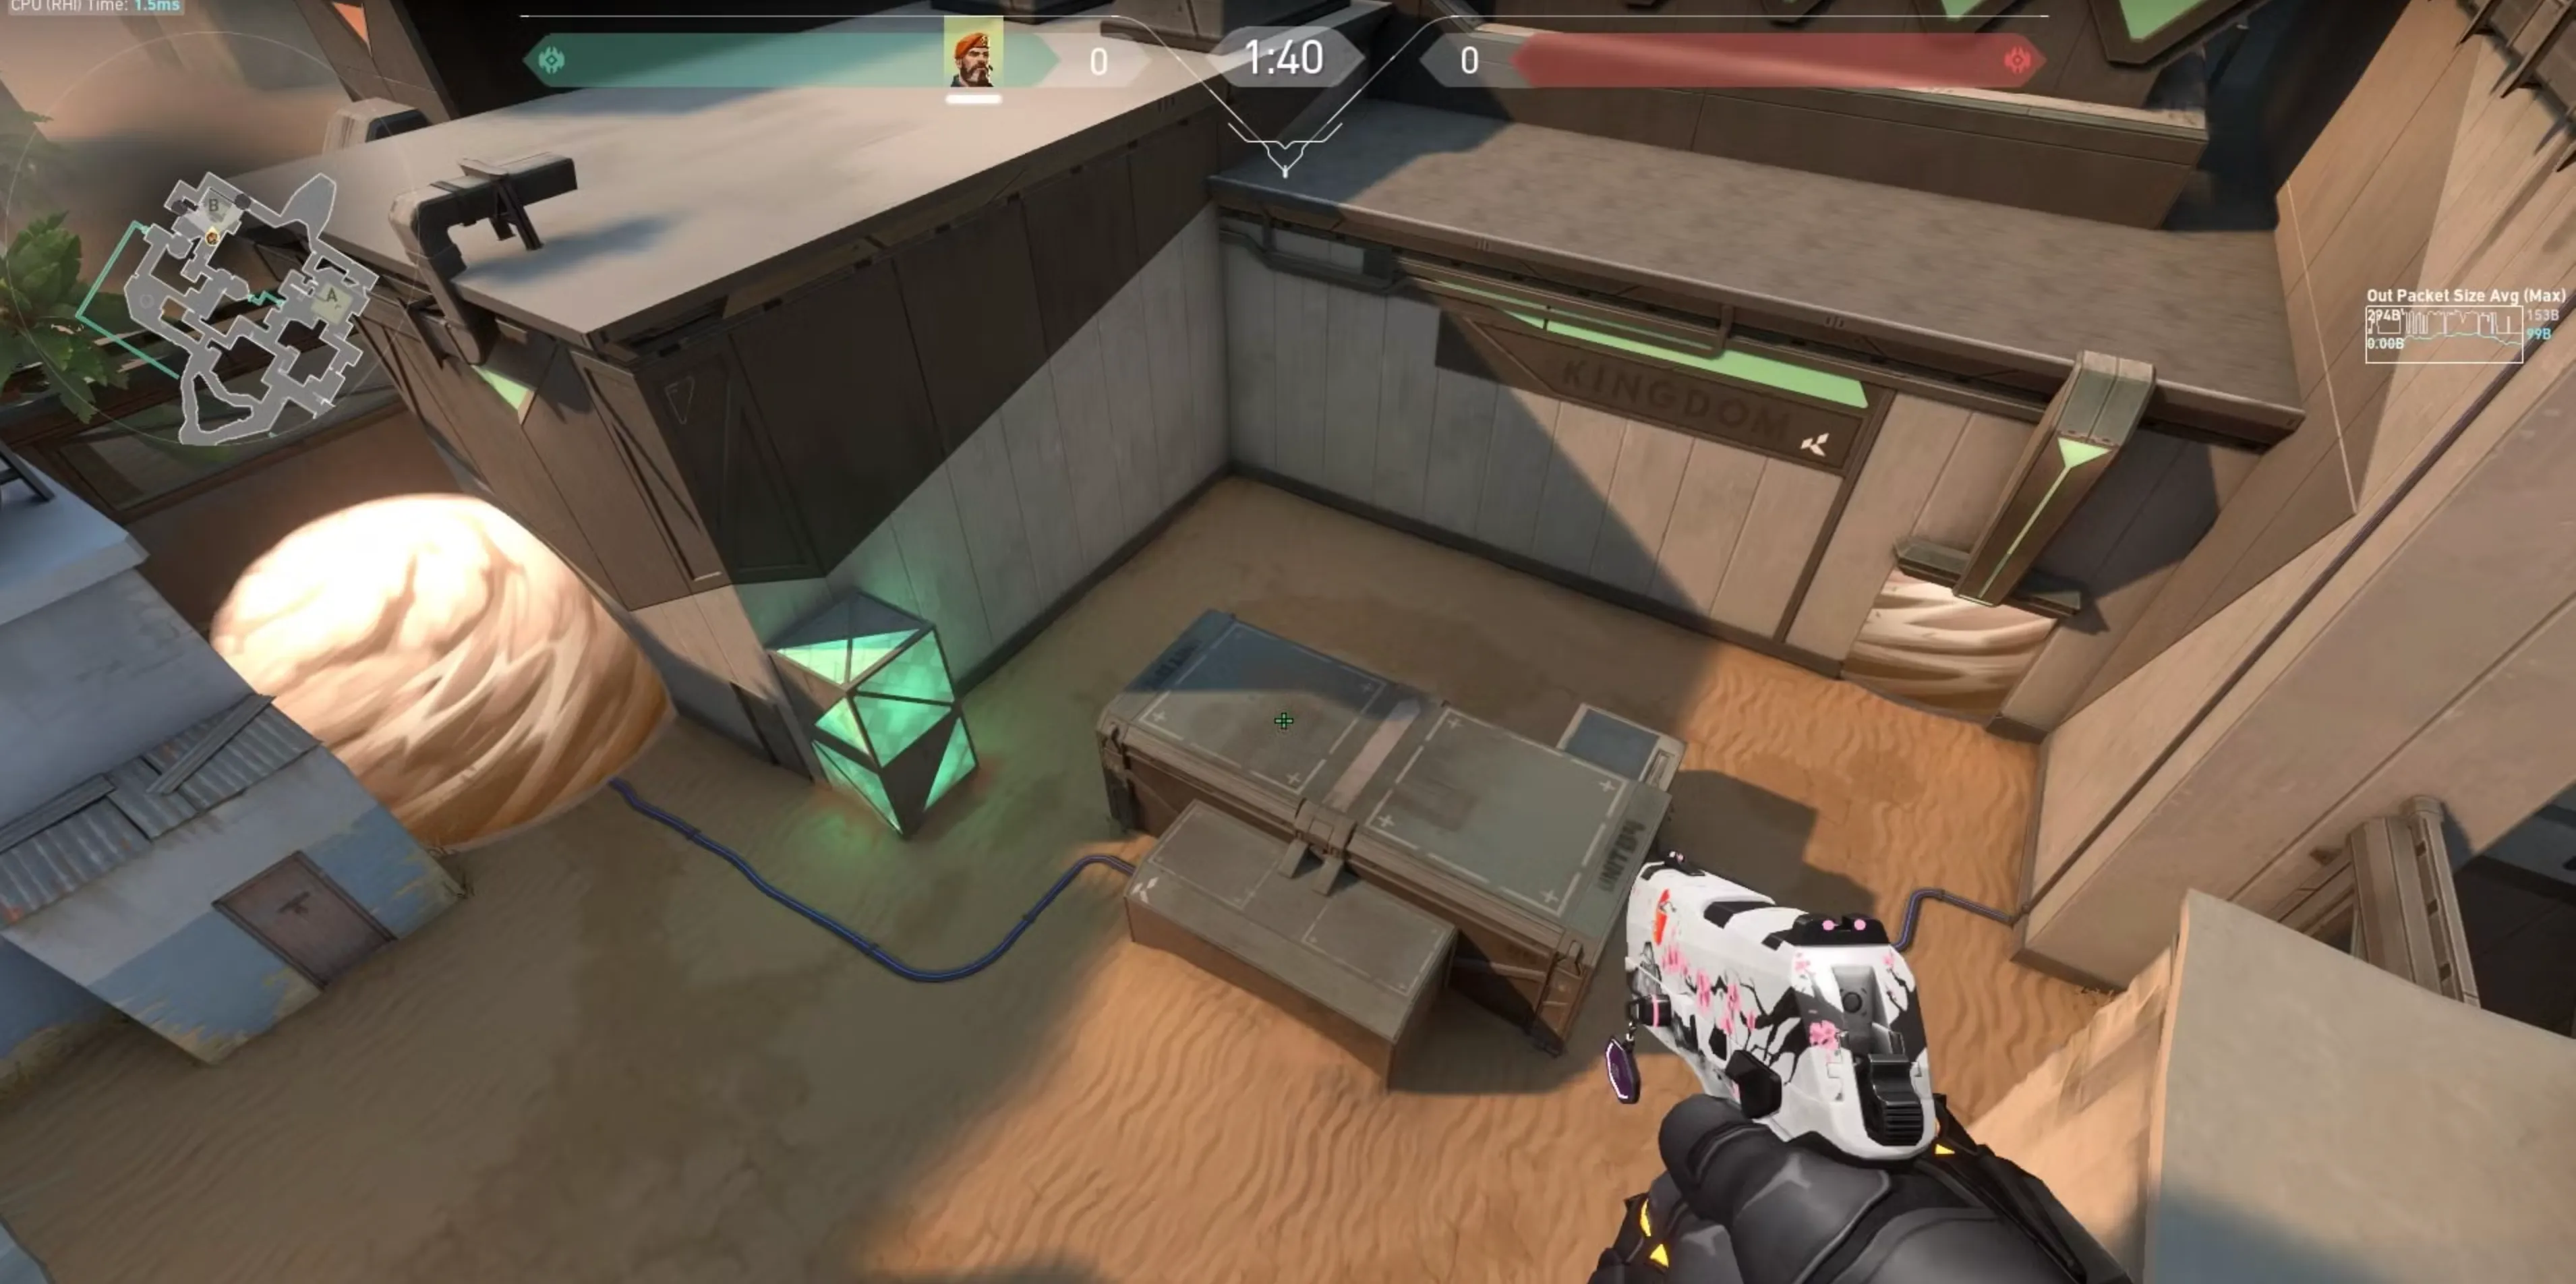
Whether you’re executing a split push or focusing on a single-lane attack, the same smoke setup works effectively for taking control of B Site. Unlike A Site, B has shorter sightlines, so creating a smoke “pocket” isn’t as advantageous. Instead, focus on blocking key rotation points to ensure a smooth entry.
Place one smoke at the entrance of Elbow and another at Defender Spawn. These smokes cut off critical angles, giving your team the space needed to secure the site. Avoid placing smokes on Tube, as this can provide defenders with an easy hiding spot for close-range attacks, like a surprise shotgun play.
Save your third smoke to delay the enemy team’s retake. Properly timing your final smoke can disrupt their approach and give your team a stronger hold on the site. This setup prioritizes control and minimizes defensive threats during your attack.
#6: Executing a Split Attack on A Site
Attacking A Site from both Short and Shower is a powerful strategy that provides your team with greater control and forces defenders to split their attention. This approach works best when your team has the resources for rifles and full utility, as proper coordination is key to its success. Timing is crucial—make sure your smokes are deployed before your teammates push out, preventing Operators in Heaven or defenders from taking easy picks.
For this setup, deploy one smoke to block off Heaven, cutting off a critical high-ground angle. Place the second smoke to cover Defender Spawn, limiting rotations and reinforcements. Finally, use the third smoke at the entrance of Lamps to deny defenders control of the interior space.
This smoke arrangement creates multiple safe entry points for your team, making it easier to secure the site and set up a post-plant defense. Clear communication and synchronized execution will ensure this strategy’s effectiveness.
#5: Defending B Site
Defending B Site requires straightforward yet effective smoke placements to disrupt the attackers’ push. Since the attackers can approach through both Hookah and Long at the start of the round, your primary objective is to block these entry points and delay their advance.
Place one smoke at the edge of Hookah to leave attackers exposed as they drop off the ledge, making them easy targets. Position your second smoke at the Garden connector leading to Long, cutting off vision and forcing the attackers to use utility or reposition.
Stay alert for audio cues from the B Teleporter, as it can indicate a potential rotation. Communicating with your team about these movements ensures you’re prepared to respond and maintain control of the site. This smoke setup effectively disrupts enemy plans and buys valuable time for your team to adjust their defense.
#4: Attacking A Site After Gaining Control
Securing an early pick on the enemy team gives your squad a significant advantage when attacking A Site. With fewer defenders to hold the site, your smokes can be used more strategically to block rotations and solidify your control. The goal is to cut off reinforcements and maximize your team’s presence on the site.
Start by placing one smoke on Heaven to deny defenders their crucial high-ground angle. Then, position another smoke at the entrance to Defender Spawn, blocking visibility and delaying rotations from B. With these two smokes in place, the remaining defenders will find it much harder to contest your push.
The third smoke offers flexibility depending on the situation. You can either re-smoke Heaven or Defender Spawn to maintain control, or place it on Short to block potential flanks. By adjusting your smokes to match your team’s needs, you can ensure a smooth transition into post-plant defense and secure the round.
#3: Aggressively Defending A Site
For a more proactive defense on A Site, you and your teammates can choose to push attackers early, denying them valuable map space. This aggressive strategy forces attackers to expend time and utility to reclaim ground, disrupting their plans and creating opportunities for your team to secure early kills.
Place one smoke at the common angle outside Shower to block their sightlines and limit their ability to hold the area. The second smoke should be positioned deep into Short, effectively dividing the path and isolating the attackers.
By combining this setup with Brimstone’s Molotov, you can lock down one side of Short, forcing attackers to funnel through the other. This tactic allows your team to take the fight to the attackers, giving you control of the tempo and a greater chance of stopping their push before it gains momentum.
#2: Executing an A Site Push from Short
Attacking A Site through Short is an effective strategy for overwhelming defenders, particularly in pistol or eco rounds where close-range engagements work to your advantage. This approach capitalizes on speed and pressure, allowing your team to secure the site quickly. However, in full-buy rounds, it’s better to aim for broader site control using additional utility and firepower.
For this smoke setup, place one smoke at the entrance to Lamps to block defender visibility and restrict their ability to contest. The second smoke should cover the right side of Truck, cutting off another key angle defenders can use to hold the site. Finally, position the third smoke between the Triple Stack and the Shower wall, isolating any remaining defenders and giving your team a clear path to secure A Site.
By effectively utilizing these smokes, you can create a safer entryway, disrupt defensive setups, and take control of the site with ease.
#1: Aggressive B Site Defense
Gaining map control as a defender is a crucial strategy for limiting attackers’ options and increasing your chances of winning the round. By working with your teammates to aggressively contest key areas like Long and B Link, you can deny the attackers the space they need to execute their strategies effectively.
At the start of the round, deploy one smoke at the entrance to Long to cut off their line of sight and force hesitation. Place the second smoke at B Link to block their rotation path and further limit their options.
It’s essential to coordinate with a teammate for this aggressive play. Their utility can help support the push, or they can act as a trade partner if things go sideways. This tactic constrains the attackers’ movements, making their pushes more predictable and giving your team the upper hand in controlling the flow of the round.
Conclusion
Mastering Brimstone’s smokes on Bind is essential for gaining control and outplaying your opponents. Whether you’re attacking or defending, well-placed smokes can deny vision, disrupt rotations, and create safer opportunities for your team to execute strategies. Bind’s unique layout, with its teleporters and compact sites, rewards precise utility usage, making Brimstone a key asset for controlling the map.
By practicing these eight effective smoke setups, you’ll enhance your impact as a Controller, giving your team the edge needed to secure rounds and dominate Bind. With Brimstone’s tactical utility in your arsenal, you’ll be ready to lead your team to victory on this iconic Valorant map.
Posted On: January 30th, 2025
Recent Articles


💬 Need help?
Our 1v9 support team is available 24/7 to help you with any questions or issues you may have.
support@1v9.gg
Loading...
1v9.gg is not endorsed or affiliated by any game developers or publishers.
2025 1v9, All Rights Reserved, Created By NightDev