


Rainbow Six Siege: 8 Best Trap Operators
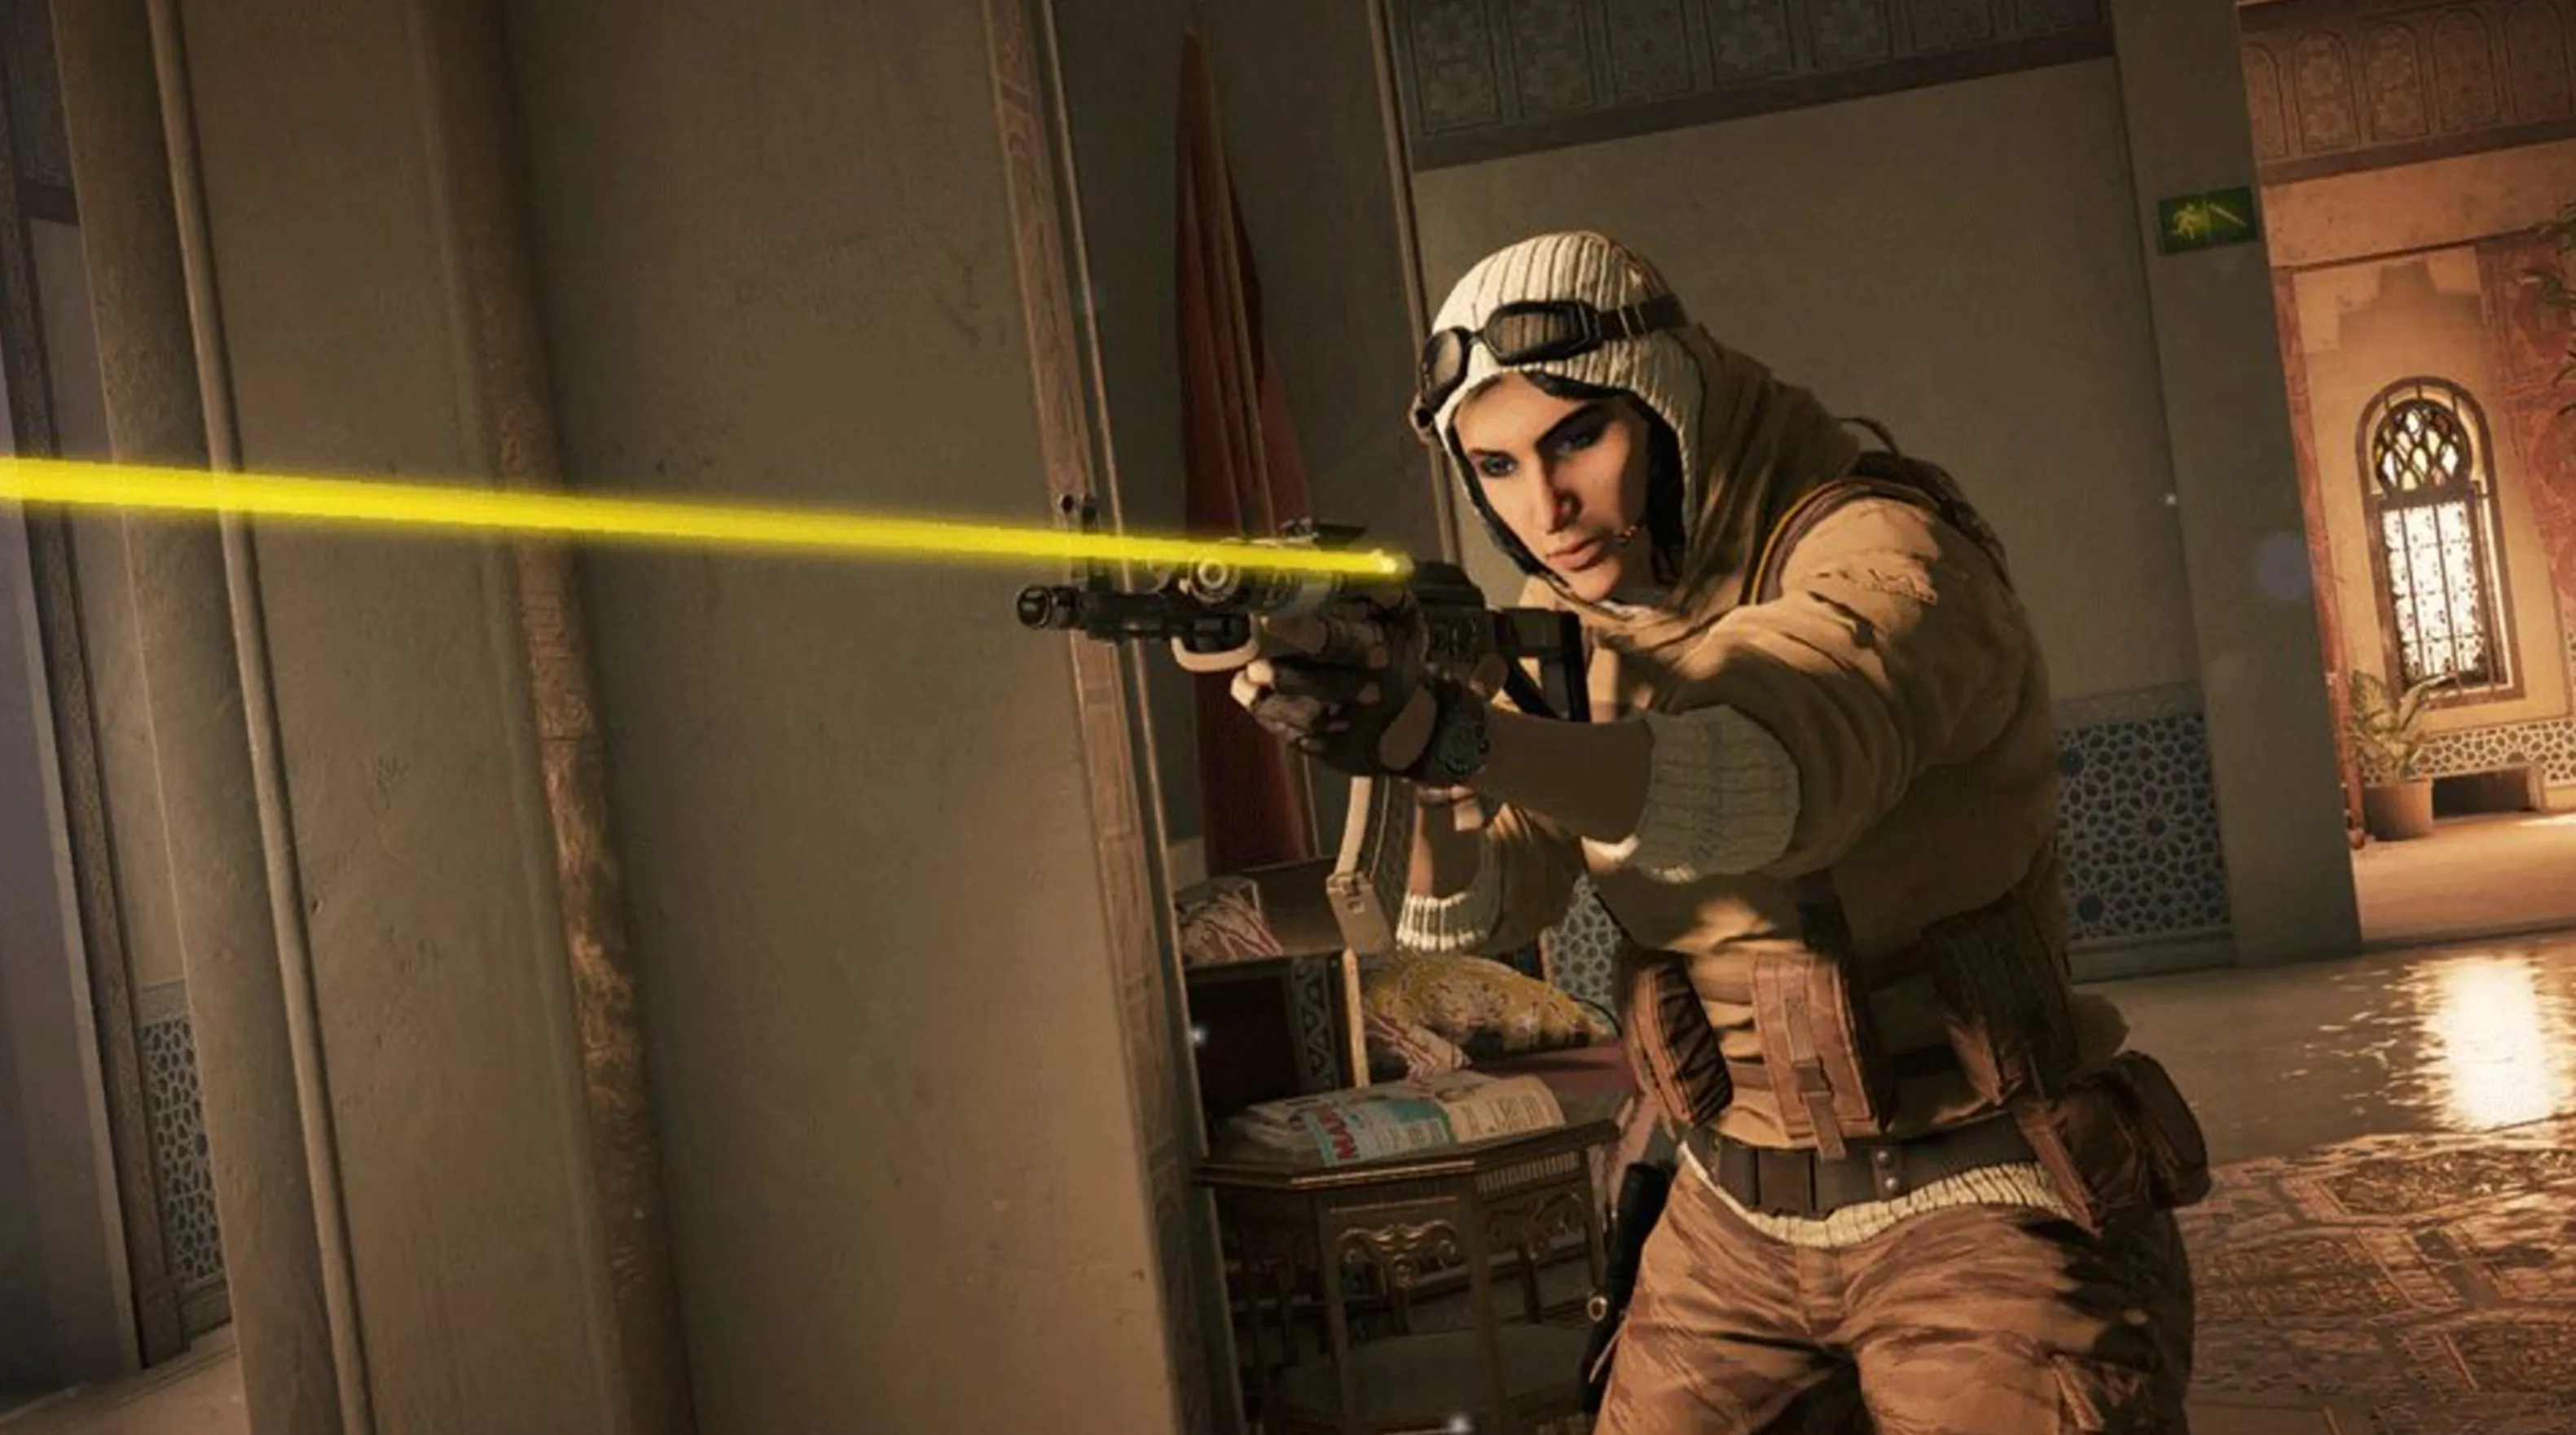
Rainbow Six Siege offers players a wide array of unique operators, each designed to fulfill specific roles on the battlefield. Among them, trap operators stand out for their ability to disrupt and outsmart opponents through clever gadget use. Unlike other operator roles, trap specialists aren’t confined to attacking or defending—they excel at controlling the pace of the game and creating opportunities for their team. Whether it’s through deploying lethal gadgets to guard objectives or laying traps to catch unsuspecting enemies off guard, trap operators can significantly shift the tide of a match.
However, with such a diverse roster, choosing the most effective trap operator can be overwhelming. While many operators bring value with the right strategies, a select few have risen in popularity due to their powerful gadgets and versatile kits. In this article, we’ll explore the eight best trap operators in Rainbow Six Siege, breaking down what makes each of them so impactful. Let’s dive in!
#8: Gridlock

Gridlock is a powerful trap operator on the attacking side, introduced in Operation Burnt Horizon. Her unique gadget, the Trax Stingers, offers unparalleled area denial by deploying clusters of spiked traps that spread out to cover a wide radius. These spikes are excellent for blocking rotations, slowing down defenders, and punishing those who try to traverse them.
Gridlock shines in post-plant scenarios, where her Trax Stingers can secure flanks and choke points, making it incredibly difficult for defenders to push or defuse. Her gadget isn’t limited to post-plant situations either—attackers can use the traps to block roamers from sneaking up or to funnel defenders into predictable positions.
Pairing her gadget with her weapon loadout makes Gridlock a reliable operator. She comes equipped with the F90 Assault Rifle and M249 LMG, both offering excellent versatility in combat, while her Gonne-6 secondary weapon can handle bulletproof gadgets with ease. While she isn’t the fastest operator due to her three-armor, one-speed setup, her durability allows her to hold strong positions.
Gridlock is ideal for players who prefer a more tactical and deliberate playstyle, focusing on controlling key areas and securing the team’s advance. While she’s not as flashy as other trap operators, her utility and ability to disrupt defensive movements make her a valuable asset.
#7: Goyo

Goyo brings a unique twist to the trap operator role in Rainbow Six Siege, combining area denial with explosive damage. His signature gadget, the Volcán Canister, is a deployable device that detonates into a fiery explosion when triggered, spreading flames over a wide area and creating a deadly hazard for anyone nearby. These canisters can be placed on floors, walls, or doorways, making them highly versatile for both defensive and offensive plays.
What sets Goyo apart is his ability to not only deal damage but also delay attackers significantly. When used strategically, the flames from his Volcán Canisters can block access points, forcing attackers to either wait or take a more dangerous route. This is especially effective in final moments when time is running out for attackers to secure the objective.
Goyo pairs his gadgets with a solid loadout, featuring the Vector .45 ACP, known for its rapid fire rate and accuracy, and the TCSG12, a semi-automatic shotgun that doubles as a long-range weapon. His Impact Grenades or Proximity Alarms further enhance his ability to disrupt enemy plans and provide intel.
While Goyo requires precise placement and timing to maximize his effectiveness, his ability to control high-traffic areas and punish attackers who rush in recklessly makes him an invaluable operator. Players who enjoy planning their defenses and outthinking opponents will find Goyo an excellent addition to their roster.
#6: Thorn

Thorn is a Defender who thrives on catching attackers off-guard with her signature gadget, the Razorbloom Shells. These throwable proximity devices explode shortly after being triggered, dealing significant damage to anyone within their radius. Thorn’s gadget is excellent for punishing careless attackers who move too quickly or fail to clear areas effectively.
The Razorbloom Shells are incredibly versatile, as they can be hidden in unexpected locations such as behind furniture, under windows, or around corners. This makes them highly effective for area denial and securing choke points. When attackers trigger the device, they must either escape the blast radius or suffer the consequences. Paired with good map knowledge, Thorn can control key parts of the map and create bottlenecks for attackers.
Thorn’s loadout complements her aggressive playstyle. The UZK50GI SMG offers a high fire rate and low recoil, making it ideal for close-quarters combat. Additionally, her 1911 TACOPS pistol provides a reliable secondary option, while her Barbed Wire and Deployable Shield gadgets add utility to her arsenal by reinforcing defensive setups and slowing down attackers.
Thorn shines in the hands of players who enjoy setting traps and playing unpredictably. Her ability to secure kills through clever gadget placement and force attackers to rethink their approach makes her a valuable pick for any defensive team. Whether used to hold an objective or protect roaming teammates, Thorn’s toolkit ensures she remains a persistent threat on the battlefield.
#5: Ela

Ela is a dynamic Defender known for her ability to disrupt attackers and turn the tide of engagements with her Grzmot Mines. These proximity-triggered concussion devices disorient enemies upon detonation, reducing their aim accuracy and muffling their hearing. Unlike lethal traps, Grzmot Mines are designed to incapacitate rather than eliminate, making them perfect for setting up ambushes or delaying enemy advances.
Ela’s Grzmot Mines can be deployed almost anywhere, including doorways, windows, and high-traffic areas. Their versatility allows her to guard objectives, protect flanking routes, and alert teammates to enemy presence. The disruption caused by these mines can give Ela or her teammates a critical advantage in firefights, turning what might have been a fair engagement into a one-sided takedown.
Ela’s weaponry supports her aggressive playstyle. Her Scorpion EVO 3 A1 SMG boasts a blistering fire rate, making it deadly at close range, although it requires precise recoil control. For players preferring versatility, her FO-12 shotgun can dominate in tight spaces. She also has the reliable RG15 pistol, equipped with a built-in red dot sight, giving her excellent precision for finishing off opponents.
In addition to her gadgets and weapons, Ela has the unique ability to recover from a downed state when using her Grzmot Mines. This self-revival mechanic, though situational, can give her a second chance to contribute to the fight. Combined with her fast movement speed and ability to roam effectively, Ela excels in creating chaos for attackers.
Ela is an ideal choice for players who thrive on unpredictability and quick reflexes. Her disruptive gadgets and aggressive toolkit make her a constant menace, keeping attackers on edge and disrupting their plans at every turn. Whether used to secure objectives or hunt down roaming attackers, Ela’s impact is felt throughout the match.
#4: Wamai

Wamai is a versatile Defender who brings a unique approach to the trap playstyle with his Mag-NET System, a gadget designed to redirect and neutralize throwable devices. While not a traditional trap operator in the sense of dealing direct damage, Wamai’s gadgets create chaos for attackers by turning their own utility against them.
The Mag-NET System is a throwable device that attaches to walls, ceilings, or floors and activates when an enemy throws grenades, flashes, or other projectile-based gadgets. Once activated, it pulls the projectile toward itself and detonates it in the redirected location. This not only neutralizes the immediate threat but can also force attackers into unfavorable positions or disrupt their planned strategy.
Strategically placing Mag-NETs in high-traffic areas or near critical entry points ensures that attackers’ utility becomes less effective, giving your team the upper hand. For example, an attacker tossing a frag grenade to clear a room might inadvertently end up damaging their own teammates due to Wamai’s clever placement of a Mag-NET. His gadget can also work in tandem with other Defenders’ traps, such as Jager’s ADS system or Goyo’s Vulcan Canisters, to create devastating chain reactions.
Wamai’s weapons complement his ability to roam and support the team. His AUG A2 assault rifle is highly accurate and effective at medium to long ranges, while the MP5K SMG offers solid close-range firepower. He also has access to impactful secondary gadgets, like the Impact Grenade or Deployable Shield, which allow him to adapt to various defensive strategies.
Wamai’s role as a trap operator lies in his ability to disrupt and manipulate the battlefield. While his gadgets don’t deal direct damage, their potential to redirect grenades, flashes, and other utility can create significant advantages for your team. Wamai is an excellent choice for players who prefer a more cerebral, utility-focused approach to defense, using their gadgets to outsmart and outmaneuver the attackers.
#3: Nomad
Nomad is an Attacker with a distinct trap-based playstyle, thanks to her Airjab Launcher, which provides unparalleled crowd control. While not a traditional trap in the sense of damage, Nomad’s Airjab Repulsion Mines disrupt enemies by knocking them back, leaving them vulnerable for follow-up attacks or delaying their push.
The Airjab Launcher fires sticky repulsion mines that attach to walls, floors, or ceilings. When triggered by proximity, the mines emit a forceful blast that knocks nearby defenders off their feet. This mechanic makes Nomad a valuable asset for controlling flanks and preventing defenders from sneaking up on her team. By placing Airjabs on common rotation routes or chokepoints, Nomad can ensure her team stays focused on the objective without worrying about being outflanked.
Her Airjabs shine particularly in post-plant scenarios, where defenders must approach the defuser under time pressure. A well-placed Airjab can knock them off balance, wasting precious seconds and making them easy targets for her team.
Nomad’s primary weapons, the AK-74M and ARX200, are versatile and highly effective at medium to long ranges, allowing her to engage enemies confidently. Her secondary options include the .44 Mag Semi-Auto, which comes with a high-powered scope, adding utility in ranged fights.
Nomad’s unique ability to disrupt and control enemy movement makes her one of the most effective trap-style operators in Rainbow Six Siege. While her Airjabs don’t deal damage directly, their ability to disrupt, displace, and delay defenders gives her team a significant strategic advantage. For players who enjoy tactical positioning and outmaneuvering their opponents, Nomad is a must-try operator.
#2: Fenrir

Fenrir is one of the most formidable trap-based Defenders in Rainbow Six Siege, introduced in Operation Dread Factor. His F-NATT Dread Mines are a unique form of area denial, capable of impairing attackers’ visibility and creating confusion during critical moments. These proximity-triggered devices emit a hallucinogenic gas that dramatically reduces the vision of any enemy caught within their radius.
Fenrir can deploy up to five F-NATT Dread Mines, but only three can be active at any given time, allowing for strategic placement to control key entry points and chokepoints. These mines are ideal for securing high-traffic areas like doorways, windows, or even behind cover. Attackers caught in their gas become disoriented and are far more vulnerable to ambushes or aggressive pushes from Defenders.
What sets Fenrir apart is his ability to toggle the activation of these mines, allowing him to create a psychological game of cat and mouse. Attackers never know which mines are active, forcing them to proceed cautiously and potentially waste valuable utility to clear inactive traps.
Fenrir pairs exceptionally well with other trap operators like Lesion, Kapkan, or Frost, as their combined abilities can stack to create an almost impenetrable defense. His mines are especially effective in late-round scenarios when attackers are rushing to complete their objectives, making them easy prey for his teammates.
His weapon loadout is solid, featuring the MP7 SMG with its high fire rate and excellent handling, and the SASG-12 shotgun, perfect for close-quarters combat. The Bailiff 410 secondary revolver adds versatility for creating rotation holes or additional angles.
Fenrir’s ability to slow down and disorient attackers makes him an excellent choice for players who enjoy mind games and controlling the pace of a match. Whether holding down an objective or anchoring a site, Fenrir’s F-NATT Dread Mines ensure attackers are always on edge.
#1: Lesion

Lesion has solidified his place as one of the best trap operators in Rainbow Six Siege. Introduced in Operation Blood Orchid, this Defender excels at area denial and gathering intel, making him a staple choice for players looking to disrupt attackers and control key map locations.
His GU Mines are the cornerstone of his kit. These proximity-triggered toxic mines are invisible until activated and are deployed as small, concealed traps on the ground. When an attacker triggers a GU Mine, it deals initial damage and applies a poison effect that continues to damage them over time until the mine is removed. The poison effect also slows attackers, making them easier targets for Lesion or his teammates to eliminate.
What makes Lesion stand out is his ability to deploy GU Mines passively throughout the round. He gains an additional mine every 30 seconds, allowing him to reinforce critical areas of the map as the match progresses. This feature encourages strategic placement and patience, as the longer the round goes on, the more oppressive his mines become.
Lesion’s traps are especially useful for stopping rush strategies, securing flanking routes, and protecting the objective site. When paired with other trap operators like Frost, Kapkan, or Ela, he becomes an even more formidable force, forcing attackers to navigate a minefield of hazards.
His weapon loadout is versatile, featuring the T-5 SMG, one of the best submachine guns in the game due to its high fire rate and manageable recoil, and the SIX12 SD shotgun, ideal for close-quarters combat and creating rotation holes. His Impact Grenades add another layer of utility, enabling him to create quick escape routes or deny attacker advances.
Lesion shines in late-round scenarios, where his accumulated GU Mines make it nearly impossible for attackers to move undetected. The intel provided by his traps—revealing the presence and location of enemies—can single-handedly turn the tide of a match.
Lesion is the ultimate trap operator for players who enjoy a blend of passive and active playstyles. His ability to gather information, deny access, and weaken enemies makes him a top-tier choice for any defensive lineup. Whether anchoring the objective or roaming strategically, Lesion’s toolkit ensures that attackers will always be on their toes.
Conclusion
Trap operators in Rainbow Six Siege add a unique strategic layer to gameplay, turning the battlefield into a maze of hazards for unsuspecting opponents. These operators excel at slowing down attackers, gathering intel, and forcing opponents into unfavorable positions, giving their teams a critical advantage. From Lesion’s poisonous GU Mines to Fenrir’s vision-disrupting traps, each operator brings a distinct playstyle that rewards tactical thinking and precise placement.
Choosing the right trap operator for your team depends on the map, the objective, and your preferred approach to defense or even offense. Whether you’re setting up lethal zones with Goyo or disorienting enemies with Thorn, these operators can drastically shift the momentum of a match. Mastering their gadgets and understanding the best placements will make you an invaluable asset to your team, leaving attackers scrambling to adapt.
Trap operators remain an integral part of Rainbow Six Siege, offering endless possibilities for clever strategies and game-changing plays.
Posted On: January 31st, 2025
Recent Articles


💬 Need help?
Our 1v9 support team is available 24/7 to help you with any questions or issues you may have.
support@1v9.gg
Loading...
1v9.gg is not endorsed or affiliated by any game developers or publishers.
2025 1v9, All Rights Reserved, Created By NightDev