Best Support Stadium Builds In Overwatch 2
Overwatch 2’s Stadium mode, introduced in Season 16, completely changes how players approach each match by removing hero swaps and adding round-based progression. Instead of switching heroes mid-game, players commit to one Support character and strategically enhance their abilities by purchasing Powers and Items with earned credits after each round. This unique system rewards creativity, coordination, and smart decision-making, as your chosen build can make or break a game.
Support heroes in Stadium mode are incredibly versatile. They can focus on healing and sustain to keep their team alive longer, take a hybrid approach by adding utility and crowd control, or even boost their offensive potential to help secure kills alongside damage dealers. With the right setup, Supports can shift from passive healers to aggressive playmakers capable of carrying entire rounds. In this guide, we’ll cover the best Support Stadium builds in Overwatch 2, showing you how to optimize each hero’s strengths and dominate matches from start to finish.
Torpedo Juno Stadium Build

If you want to turn Juno into a powerhouse of healing and burst damage in Overwatch 2 Stadium mode, this Torpedo Juno build is one of the best setups you can use. It focuses on enhancing her Pulsar Torpedoes to maximize both their offensive and supportive potential, allowing Juno to deal massive area damage while simultaneously keeping her allies sustained during fights. By combining ability power, cooldown reduction, and Lifesteal bonuses, this setup turns every Pulsar shot into a deadly heal bomb that punishes enemies and rewards precise play.
Torpedo Juno Build – Powers
• Round 1: Pulsar Plus – Adds one extra charge to Pulsar Torpedoes for better uptime.
• Round 3: Cosmic Coolant – Reduces Pulsar Torpedo cooldown by 0.5s for every target hit.
• Round 5: Medicinal Missiles – Increases Pulsar healing by 30 HP and boosts healing received by 50% for 3s.
• Round 7: Stinger – Mediblaster inflicts 10 additional damage over 1s (does not stack).
Early Game (Round 1–2)
Start by establishing your ability scaling and cooldown efficiency. Grab Power Playbook (+10 ability power) and Multi-Tool (+10% cooldown reduction) to improve your early rotations. PulStar Destroyers adds area explosions to your Pulsar Torpedoes, giving you early AoE pressure and minor Lifesteal. Add Nano Cola (+20% ability power) for a bigger healing boost and Armored Vest (+25 Armor) for survival.
Mid-Game (Round 3–5)
This is where Juno’s healing and DPS truly ramp up. Stack Champion’s Kit (+40% ability power) and Three-Tap Tommygun for added damage output after each ability. Pulse Spike further increases projectile speed and grants attack speed after using Torpedoes, letting you burst down enemies quickly. Keep Vital-e-tee to convert HP into Armor for extra tankiness, and Multi-Tool to maintain ability uptime.
Late Game (Round 6–7)
At this stage, Juno becomes a self-sustaining damage dealer and healer hybrid. Catalytic Crystal ensures constant Ult. Charge gain through damage and healing, while Lock-On Shield gives Overhealth when aiming Torpedoes, improving survivability. Combine this with Liquid Nitrogen to slow enemies on hit, and Champion’s Kit for unmatched ability scaling. The synergy between healing, damage, and sustain makes this build one of the most well-rounded for clutching fights and keeping your team alive deep into the late rounds.
This version of the Torpedo Juno build perfectly balances aggression and support, letting you dominate in Overwatch 2’s Stadium mode by turning every missile into both a threat and a lifesaver.
Supernano Ana Stadium Build

If you’re looking to turn Ana into an unstoppable force of healing, damage, and utility in Overwatch 2’s Stadium mode, the Supernano Ana build is the way to go. This setup focuses on maximizing unscoped rifle fire for both rapid healing and consistent damage pressure, allowing you to farm Nano Boosts faster than ever. By stacking attack speed, weapon power, and ammo efficiency, Ana transforms into a high-impact support who can keep her allies alive while dishing out serious punishment to enemies. Once her Nano Boost is ready, she can empower multiple teammates and even herself, creating devastating teamfight potential.
Supernano Ana Build – Powers
• Round 1: No Scope Needed – Hitting unscoped shots with Biotic Rifle grants +10% attack speed for 2s, stacking up to 3 times.
• Round 3: Your Full Potential – Nano Boost grants +20% Ultimate Charge and +200 Overhealth to its target.
• Round 5: Our Turn – Nano Boost now affects other allies in your line of sight but lasts 50% shorter on them.
• Round 7: My Turn – Nano Boost also applies to yourself for half its duration.
Early Game (Rounds 1–2)
Start strong by enhancing your base weapon stats. Pick up Weapon Grease and Compensator for early damage and fire rate boosts, then grab Potent Projectiles to increase the size of unscoped shots—making it easier to hit allies and enemies alike. Add Advanced Nanobiotics for a solid weapon power boost and Aftermarket Firing Pin to gain extra attack speed after healing teammates. If possible, round out your early setup with Ammo Reserves to keep the shots flowing during prolonged fights.
Mid-Game (Rounds 3–5)
This is where your build starts to come online. Unscoped Resources gives you a 50% chance to conserve ammo, keeping your fire consistent while maintaining pressure. Technoleech adds weapon Lifesteal, providing valuable sustain in fights. Combine it with Shieldbuster for extra attack speed against tankier opponents, and Booster Jets to gain burst mobility after each ability use. Eye of Horus dramatically enhances Nano Boost utility—allowing you to hit allies through walls—and Weapon Jammer helps neutralize enemy DPS builds by reducing their bonus attack speed.
Late Game (Rounds 6–7)
By the late rounds, this build reaches its peak efficiency. Target Tracker enhances Biotic Grenade utility and further increases your fire rate with each ally or enemy affected. Salvaged Slugs boosts barrier damage and keeps your ammo topped up, while Commander’s Clip adds even more ammo and attack speed synergy. Combine these with Icy Coolant for cooldown reduction and Booster Jets for unmatched agility. In the final rounds, Ana becomes a self-sufficient hybrid—able to output massive healing, constant chip damage, and clutch Nano Boosts that can flip entire fights in your favor.
The Supernano Ana build thrives on tempo and precision, rewarding skilled aim and fast reaction times. With this setup, you’ll not only farm Nano faster but turn Ana into a battlefield commander capable of dictating the pace of every engagement in Overwatch 2’s Stadium mode.
DPS Lucio Stadium Build

If you want to transform Lucio from a pure support into a high-speed duelist capable of bursting down enemies while still helping his team, this DPS Lucio build is the perfect choice. It focuses on mixing weapon power, attack speed, and ability power to maximize both his offensive pressure and utility. With this setup, Lucio can dive into fights, peel for allies, and even one-shot squishy heroes with the right Soundwave and melee combo. The faster attack speed and mobility upgrades also allow you to play aggressively while maintaining strong healing and crowd control through Soundwave resets and crossfade synergy.
DPS Lucio Build – Powers
• Round 1: Let’s Bounce – Soundwave knockback increased by 30%, and enemies that hit a wall take 40 bonus damage.
• Round 3: Reverb – Grants an additional charge of Soundwave.
• Round 5: Vivace – While airborne or Wallriding, Soundwave cooldown refreshes 25% faster and generates +1 Max Ammo every second until reloading.
• Round 7: Crowd Pleaser – After using Soundwave, heal all allies affected by Crossfade for 200% of its healing value.
Early Game (Rounds 1–2)
Start by establishing your attack speed and ability scaling. Pick up Weapon Grease and Power Playbook for early offensive consistency, followed by Heartbeat Sensor to help track low-health enemies and chase kills more effectively. Riff Repeater gives your projectiles ricochet power, making it easier to pressure grouped enemies and rack up damage. Pair it with Lofly Beats, which lets Soundwave knock Lucio backward while in Speed Boost—perfect for mobility combos and quick escapes. Finish your setup with Wrist Wraps to gain both ability power and attack speed for faster execution on your volleys and boops.
Mid-Game (Rounds 3–5)
This is where the DPS Lucio playstyle starts to come alive. Keep Riff Repeater for multi-target pressure and pair it with Aftermarket Firing Pin and Booster Jets to enhance your attack and movement speed during fights. Add Multi-Tool and Icy Coolant to shorten cooldowns and increase ability uptime, ensuring you can chain Soundwaves more frequently. Champion’s Kit gives a massive +40% ability power spike, greatly boosting both your Soundwave damage and Crossfade healing. The combination of speed, power, and mobility during this stage allows Lucio to play as an offensive disruptor without losing his support utility.
Late Game (Rounds 6–7)
In the final rounds, this build reaches peak performance. Booster Jets and Speed Skates keep your momentum high, letting you dive in and out of combat while maintaining pressure. Iridiscent Iris provides bonus cooldown reduction and Overhealth after spending Ultimate charge, which gives you the survivability needed for late-game brawls. Finally, add Three-Tap Tommygun to boost both ability power and attack speed, ensuring your weapon volleys hit harder and faster than ever. When paired with your Soundwave combo, Lucio becomes capable of bursting down fragile targets in seconds while still healing allies through Crowd Pleaser.
This DPS Lucio Stadium build perfectly balances offense, speed, and sustain, turning the beat into a weapon. It’s one of the most aggressive and rewarding ways to play Lucio in Overwatch 2’s Stadium mode—ideal for players who like to dive, disrupt, and dominate every round.
Survival-Orb Moira Stadium Build
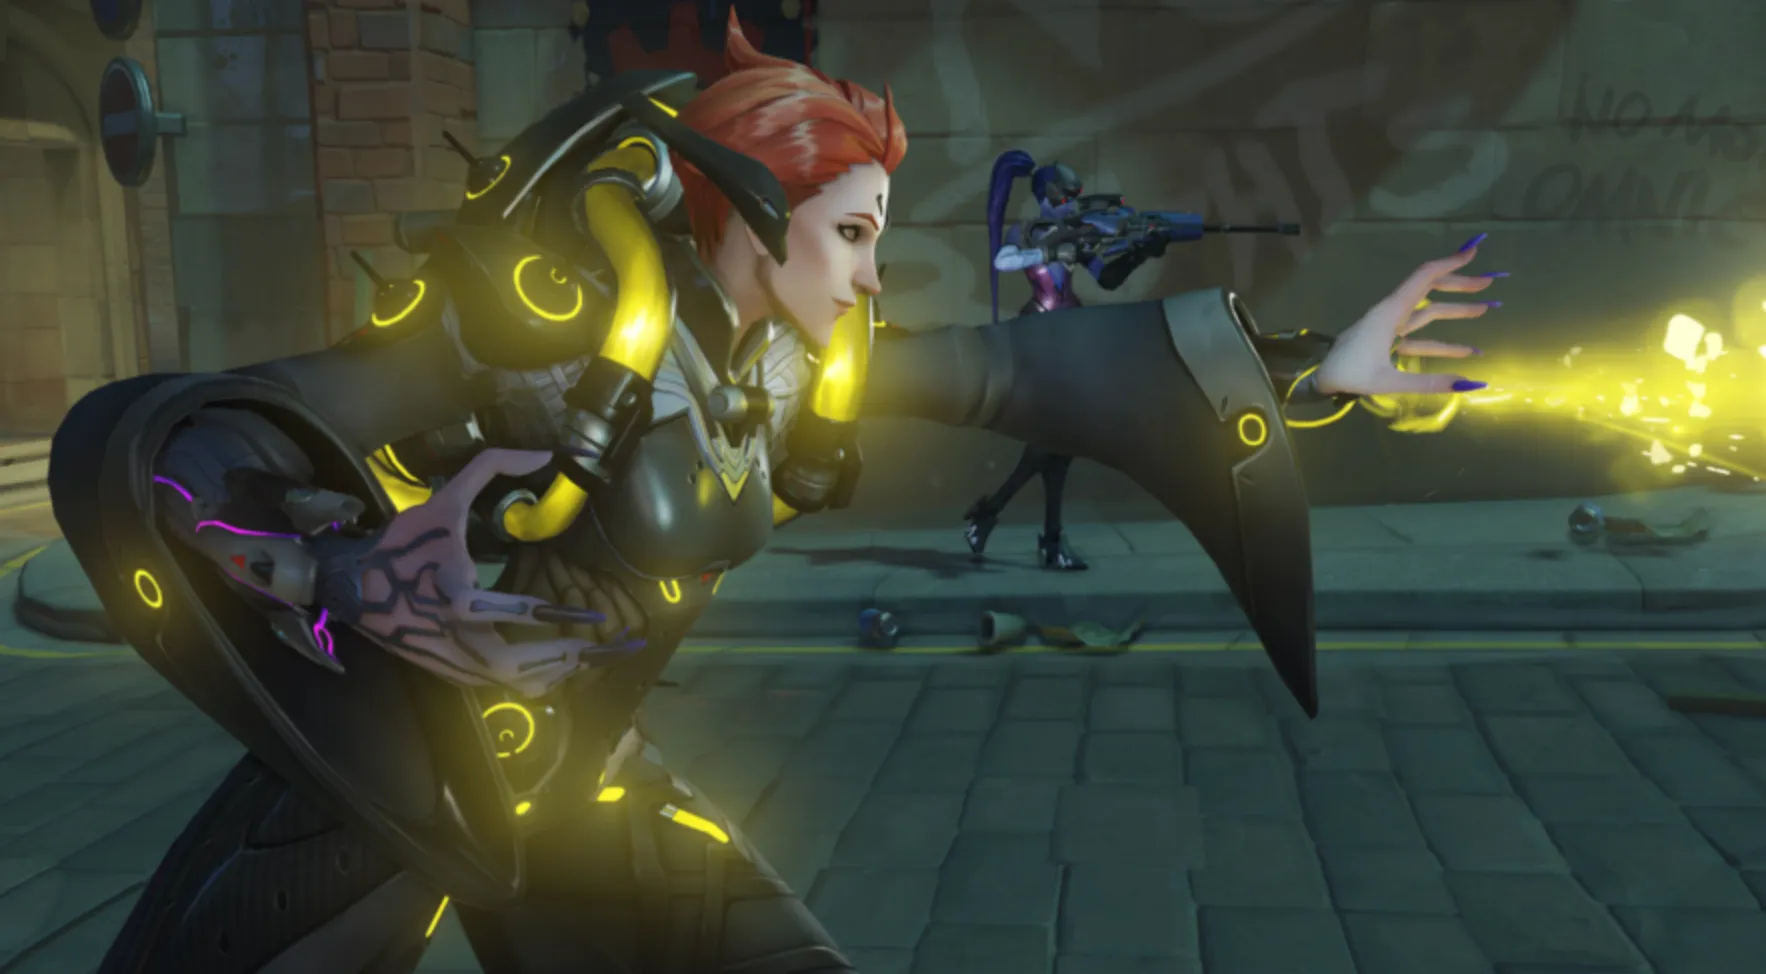
This Survival-Orb Moira build turns Moira into a self-sustaining powerhouse capable of dishing out constant healing and damage while staying alive longer than almost anyone else on the field. The setup focuses on buffing her Biotic Orbs to output massive numbers from a safe distance while improving her survivability through cooldown reduction and ability power. With this build, Moira becomes nearly impossible to pin down—fading in and out of combat with ease while still contributing consistent damage and support.
Survival-Orb Moira Build – Powers
• Round 1: Cross-Orbal – Biotic Orb launches an additional orb of the opposite type with 50% reduced capacity, increasing overall uptime.
• Round 3: Optimal Overflow – After spending 50 Biotic Energy, automatically launch your last selected Orb with reduced duration for continuous pressure.
• Round 5: Scientific Deathrod – While using Fade, passing through enemies grants 5% Ultimate Charge and Overhealth equal to 15% of your max life.
• Round 7: Multiorb – Launch two additional orbs of the chosen type with 85% reduced effectiveness for more consistent healing and damage.
Early Game (Rounds 1–2)
In the opening rounds, start by setting up the core stats Moira needs to stay active in fights. Power Playbook and Multi-Tool offer valuable ability power and cooldown reduction early on, letting you spam Orbs and Fade more frequently. Add Smart Orbs to slow down your projectiles for better area control and healing uptime. Nano Cola gives a strong boost to ability power, while Armored Vest and First Aid Kit improve survivability through extra armor and faster regen. These upgrades create a durable foundation that helps you maintain frontline presence or safely reposition as needed.
Mid-Game (Rounds 3–5)
Once you reach the mid-game, it’s time to scale up your healing and sustain potential. Extendrils greatly enhances your Orb range and Lifesteal, synergizing perfectly with Moira’s constant AoE output. Champion’s Kit and Catalytic Crystal significantly raise ability power and Ultimate gain, while Iridiscent Iris ensures you get Overhealth after spending your Ultimate—giving you a second life when fights get chaotic. Add Phantasmic Flux for extra Lifesteal and Overhealth generation, keeping you alive even during prolonged brawls.
Late Game (Rounds 6–7)
By the late rounds, your build will have turned Moira into a frontline threat that’s incredibly hard to kill. Keep Catalytic Crystal and Phantasmic Flux to maintain high damage, healing, and sustain output. Alternative Energy pairs perfectly with Fade, instantly refilling Biotic Energy and letting you stay active without downtime. Biotech Maximizer grants free flight during Coalescence, allowing you to control fights from above, and Liquid Nitrogen adds both damage utility and crowd control through slows. This combination makes Moira a self-reliant support who can outlast opponents while dealing consistent chip damage from safety.
With this Survival-Orb Moira build, you’ll turn one of Overwatch 2’s most adaptable supports into a relentless hybrid fighter—able to sustain herself, her team, and pressure the enemy with constant healing and damage across every round in Stadium mode.
Suzu Ult-Farming Kiriko Stadium Build

If you want to get Kitsune Rush faster and turn every team fight into a win, this Suzu Ult-Farming Kiriko build is one of the best setups you can run in Overwatch 2’s Stadium mode. It’s designed to maximize Ultimate generation through Protection Suzu and consistent healing output. By gaining extra Suzu charges and amplifying cleanse effects, Kiriko can build her Ult every other round while staying safe in the backline. This build also increases her weapon power, making her more than capable of finishing off weakened enemies and playing an active role in fights rather than just healing passively.
Suzu Ult-Farming Kiriko Build – Powers
• Round 1: Two-Zu – Protection Suzu gains one additional charge, allowing for more frequent cleanses and clutch saves.
• Round 3: Cleansing Charge – Cleansing negative effects with Protection Suzu grants 5% Ultimate Charge per ally cleansed.
• Round 5: Leaf on the Wind – Healing Ofuda bounces to up to two extra allies, restoring 30% healing per bounce.
• Round 7: Supported Shooting – Healing Ofuda grants healed allies +20% attack speed for 3 seconds.
Early Game (Rounds 1–2)
Focus on laying the foundation for your healing and DPS synergy. Power Playbook and Multi-Tool are great early items that give bonus ability power and cooldown reduction to improve Suzu uptime. Add Plasma Converter for weapon Lifesteal and Advanced Nanobiotics to increase your weapon power so that your damage helps fuel your healing potential. Pick up Farsight Focus Sash for improved Healing Ofuda projectile speed after dealing damage—it’s essential for faster reaction healing. Round it out with Armored Vest for some extra defense while you build momentum.
Mid-Game (Rounds 3–5)
Once you reach the mid-game, your goal shifts to optimizing Ultimate farming. Nano Cola and Champion’s Kit push your ability power higher, making each Suzu cleanse and heal more effective. Talisman of Life pairs perfectly with your Powers by adding Overhealth to Suzu targets, giving your team more durability. Iridiscent Iris adds cooldown reduction and grants Overhealth after using your Ultimate, allowing for safer repositioning post-Kitsune Rush. To make healing smoother, Spirit’s Guidance doubles your Healing Ofuda projectile speed, helping you keep up with fast-moving teammates.
Late Game (Rounds 6–7)
In the late rounds, you’ll become an unstoppable support machine. Keep Talisman of Life and Iridiscent Iris for sustain and cooldown boosts, while Goddess’s Aura ensures you gain Overhealth after teleporting with Swift Step. Combine this with Hardlight Accelerator for stacking weapon power buffs after using abilities, and Amari’s Antidote to enhance healing done to low-HP allies. With these items, you’ll consistently farm Kitsune Rush while maintaining high healing throughput and solid weapon damage.
This Suzu Ult-Farming Kiriko build turns you into a constant threat and lifesaver at once. Between fast Ultimate cycles, improved healing chains, and strong backline pressure, it’s one of the best all-around builds for dominating Overwatch 2’s Stadium mode with Kiriko.
Valkyrie Res Mercy Stadium Build

This Valkyrie Res Mercy build transforms Mercy into a high-value support who thrives on clutch plays and nonstop healing. By enhancing both Resurrect and Valkyrie, this setup lets you maintain team momentum with frequent rezzes, faster ultimate gain, and strong sustain during fights. The goal is to keep allies alive while turning every revive into a game-changing opportunity through powerful buffs, Overhealth effects, and continuous healing.
Valkyrie Res Mercy Build – Powers
• Round 1: Renaissance – After using Resurrect, automatically activate Valkyrie for 5 seconds.
• Round 3: Crepuscular Circle – While in Valkyrie, your healing and damage boost from Caduceus Staff automatically apply to nearby allies.
• Round 5: First Responder – When you resurrect a teammate, both of you gain 250 Overhealth for 6 seconds.
• Round 7: Distortion – Allies boosted by Caduceus Staff gain 20% Lifesteal, turning every push into a sustained brawl.
Early Game (Rounds 1–2)
Start the match by focusing on survivability and ultimate buildup. First Aid Kit gives you shields and faster regen, keeping you alive longer between fights. Add Compensator and Weapon Grease to slightly boost your pistol efficiency for self-defense. Winning Attitude and Junker Whatchamajig are crucial early picks—both help you build your ultimate faster, ensuring you can use Valkyrie and Resurrect frequently during the first few rounds.
Mid-Game (Rounds 3–5)
Once you reach the mid-game, this build shifts into overdrive. Caduceus Ex extends your healing beam range by 30%, allowing you to stay safe while still supporting allies. Combine it with Long Distance Wings to increase your Guardian Angel range, improving mobility and repositioning. To sustain through fights, Chain Evoker adds bonus armor and boosts your Caduceus Staff power while increasing your ultimate generation. Angeleisure Wear and Martian Mender enhance self-healing, ensuring Mercy can stay alive in the middle of chaotic team fights without relying too much on cover.
Late Game (Rounds 6–7)
In the final rounds, Mercy becomes nearly untouchable. Keep Chain Evoker, Angeleisure Wear, and Martian Mender for constant regeneration and reduced cooldowns. Add Resurrection Rangefinder to massively increase the range of Resurrect and shorten its cooldown—allowing you to safely revive teammates even from a distance. This combination makes you the anchor of your team, consistently reviving and empowering allies while staying mobile and protected.
The Valkyrie Res Mercy build is perfect for players who value utility and clutch support plays. It provides incredible sustain, reliable team healing, and near-constant ultimate uptime. With this setup, every resurrection becomes a momentum swing, making you one of the most valuable heroes in Overwatch 2’s Stadium mode.
Ultimate Discord Orb Zenyatta Stadium Build

This Ultimate Discord Orb Zenyatta build focuses on maximizing Zenyatta’s offensive power, transforming him into a lethal glass cannon who can melt enemies from any distance. By stacking ability power and attack speed, you’ll amplify both your Discord Orb utility and your Orb of Destruction damage output, making Zenyatta a nightmare for Tanks and fragile heroes alike. With precise aim and smart positioning, this build turns every Discord target into an easy elimination while keeping Zen alive just long enough to dominate the field.
Ultimate Discord Orb Zenyatta Build – Powers
• Round 1: Discord Inferno – Critically hitting a Discorded target causes an explosion that deals 50 additional damage, ideal for team fights and burst plays.
• Round 3: Inner Peace – Gain a permanent self-applied Harmony Orb that heals you for 25% of the normal amount, providing consistent passive sustain.
• Round 5: Discord Fever – Enemies affected by Discord Orb take 50 damage over 5 seconds, adding pressure and chip damage across the map.
• Round 7: Circle of Strife – During Transcendence, apply Discord Orb to every enemy within range, turning your ultimate into a teamwide damage amplifier.
Early Game (Rounds 1–2)
The key to your early game is building both power and survivability. Power Playbook gives a strong boost to ability power for your Discords, while Weapon Grease and Aftermarket Firing Pin improve attack speed and movement—essential for dodging while landing consistent volleys. Armored Vest provides early durability, and Nano Cola further increases your ability power for better Discord impact. Finally, Phantasmic Flux adds Lifesteal and Overhealth, giving you a buffer against dive heroes trying to take you out early.
Mid-Game (Rounds 3–5)
Once you reach mid-game, your Discord damage starts to snowball. Keep Phantasmic Flux for sustain and stack it with Cybervenom to apply anti-heal effects when dealing ability damage, cutting off enemy recovery. Orb of Perception ensures that all Discorded enemies are revealed—perfect for hunting squishies or tracking flankers. Haste Subroutine temporarily doubles projectile speed after casting your Orbs, making your volleys much easier to land. Combine this with Nano Cola and Aftermarket Firing Pin for improved uptime, faster fire rate, and increased lethality across the board.
Late Game (Rounds 6–7)
By late game, this build hits its peak. Keep Orb of Perception and Haste Subroutine active to guarantee your Discords land and shred through enemies. Add Superflexor for bonus health, weapon power, and stacking ability power on hit, amplifying your damage with every volley. Cybervenom continues to reduce healing across multiple targets, while Champion’s Kit gives a massive ability power boost to close out the game strong. With all these upgrades combined, every Discord Orb turns your opponents into glass targets ready to shatter.
With this Ultimate Discord Orb Zenyatta build, you’ll become one of the most dangerous supports in Overwatch 2’s Stadium mode—balancing deadly offense with just enough sustain to stay alive and obliterate anything marked by Discord.
Conclusion
The best Support Stadium builds in Overwatch 2 prove that every healer can be played in a completely new way depending on your item and Power choices. Whether you prefer Moira’s aggressive orb playstyle, Mercy’s resurrection-focused Valkyrie setup, Ana’s Nano-boosted DPS build, or Kiriko’s Suzu-focused ultimate farming combo, each support hero has unique potential in Stadium mode. Mastering how to balance healing, damage, and survivability is key to turning the tide of any match. With the right build, even supports can dominate the scoreboard, carry fights, and become the backbone of every winning team.
Posted On: October 21st, 2025
Recent Articles
💬 Need help?
Our 1v9 support team is available 24/7 to help you with any questions or issues you may have.
support@1v9.gg
Loading...
1v9.gg is not endorsed or affiliated by any game developers or publishers.
2025 1v9, All Rights Reserved, Created By NightDev


