

All Damage Types In Warframe Explained
Warframe’s combat isn’t just about aiming and shooting—it’s all about understanding how damage types work. With 15 different damage types, each offering unique effects and interactions, mastering this system can massively boost your firepower. Whether you’re shredding through Grineer armor or melting through Infested hordes, using the right element makes all the difference. In this guide, we’ll break down every damage type in Warframe, how elemental combos like Viral and Blast are formed, and why knowing these mechanics is essential for building effective weapons and Warframes. Let’s dive into the basics so you can start dealing real damage.
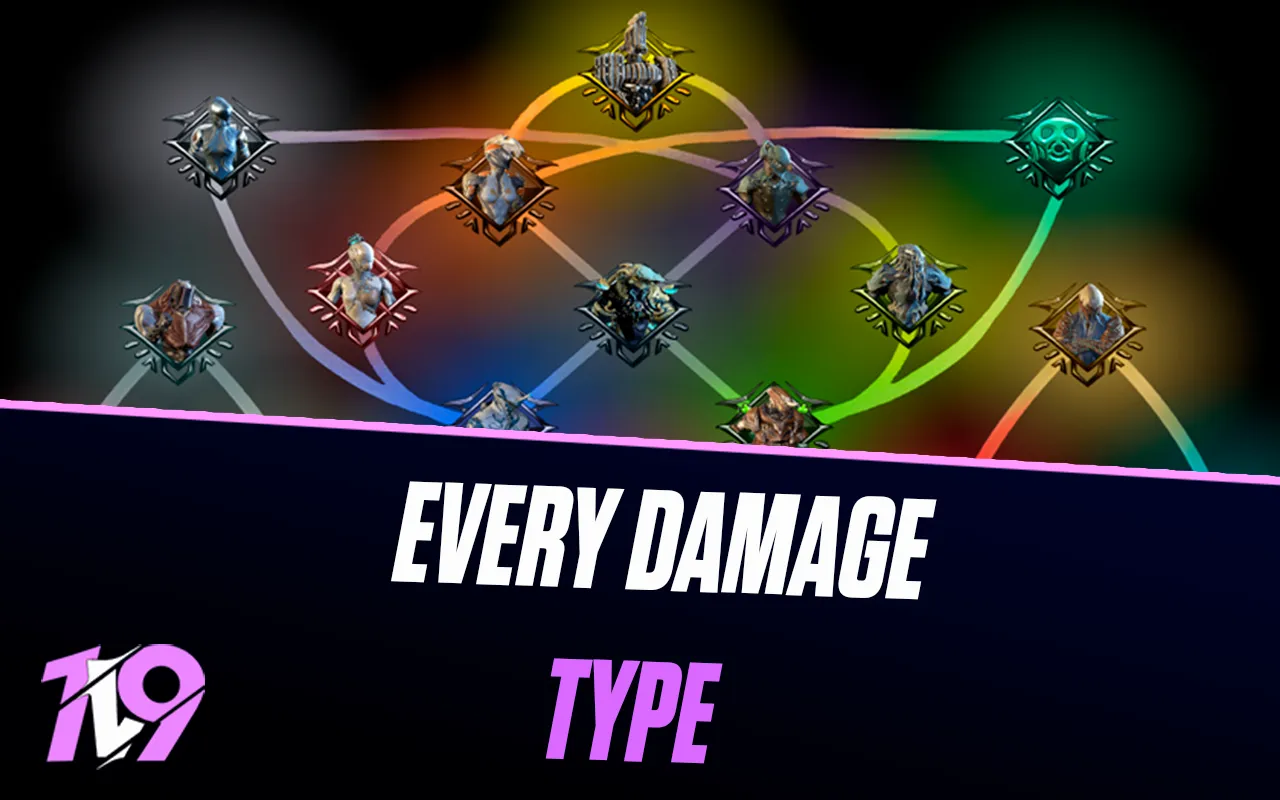
Every Damage Type In Warframe

Warframe has one of the most complex and rewarding damage systems of any looter shooter, with 15 unique damage types that can drastically change how effective your weapons are against certain enemies. These damage types are broken into three main categories: Physical Damage (IPS), Simple Elements, and Combined Elements—with a few special types used by Warframes and Operators.
Physical Damage includes Impact, Puncture, and Slash. Most weapons naturally deal one or more of these. Impact staggers enemies and makes Parazon finishers easier. Puncture lowers enemy damage output and adds flat crit chance, while Slash causes a powerful bleed effect that ignores armor—great for tougher enemies.
Simple Elements like Heat, Cold, Electricity, and Toxin can be added to your weapons through mods. Each of these comes with unique effects and multipliers. Heat burns through armor and applies a damage-over-time burn, Cold slows and freezes, Electricity chains to nearby enemies, and Toxin bypasses shields while applying a poison DoT.
Combined Elements are made by mixing two simple elements (like Heat + Toxin = Gas). These combinations provide stronger, more situational effects. For example, Corrosive melts armor fast, Viral boosts health damage, Magnetic crushes shields, and Radiation confuses enemies into attacking each other.
Special Damage Types like True and Void don’t follow the same rules. True damage cuts through both armor and shields, making it perfect for abilities that deal raw damage. Void damage, often seen in Operator attacks, is especially good against Sentients and Overguard enemies, and has the added perk of resetting Sentient resistances.
Mods let you fine-tune your weapon’s elemental output, allowing you to stack elemental combos based on your target. The right combination can make your weapon feel twice as strong—turning a tough mission into a clean sweep. Mastering the damage system is essential if you want to push high-level content or maximize your build’s potential.
In Warframe, you can enhance your weapons by adding elemental damage through specific mods. These elemental mods apply one of the core elements—Cold, Heat, Electricity, or Toxin—to your weapon, increasing its overall damage output. The elemental bonus is calculated as a percentage of your weapon’s base damage. So if you equip a 90% Toxin mod on a weapon like the MK-1 Braton, it adds Toxin damage equal to 90% of the Braton’s base damage.
You can also combine two elemental mods to create a stronger, combined element. For example, equipping a 90% Electricity mod and a 90% Toxin mod on the same weapon will result in Corrosive damage. The new combined element will deal bonus damage equal to the total of both mods—in this case, 180% of the weapon’s base damage as Corrosive. This system lets you customize your loadout to counter specific factions more effectively, since each enemy type has its own elemental weaknesses and resistances. Learning how to stack the right elemental combinations is key to maximizing your weapon’s performance in high-level missions.
What Is The Best Damage Type In Warframe?
When it comes to overall power, Viral stands out as the best damage type in Warframe. Its status effect boosts all damage dealt directly to a target’s health, making it incredibly effective against nearly every enemy in the game. Most experienced players pair Viral with Heat, since Heat not only adds a powerful damage-over-time effect but also strips away a portion of armor, making Viral’s health multiplier even more devastating.
If you’re just starting out, Corrosive + Heat is a go-to combo. Corrosive eats through Grineer armor, while Heat tears apart Infested enemies and softens up others. This combo gives you great coverage for most early missions. For Corpus enemies, though, you’ll want to swap to Toxin or Magnetic—Toxin bypasses their shields, and Magnetic shreds them outright. As you progress, understanding how to mix and match these elements will let you tailor your build to any faction or mission.
IPS - Impact, Puncture, And Slash Explained
Impact, Puncture, and Slash—often referred to as IPS—form the core damage foundation for most weapons in Warframe. These physical damage types are built into nearly every gun and melee weapon in the game, and each one brings its own unique effect in combat. Impact is great for staggering enemies and setting up finishers, Puncture weakens enemy damage output, and Slash is especially powerful thanks to its bleeding status effect that bypasses armor entirely. Understanding how your weapon leans into these stats can make a big difference in how effective it is, especially when paired with elemental mods later on.
Impact
Impact damage is especially useful when you want to keep enemies under control. It has a +50% bonus against Grineer, Kuva Grineer, and Scaldra, making it a solid pick for those factions. The Impact status effect staggers enemies and increases their health threshold for Parazon finishers by 4%, letting you trigger those finishers even when enemies have a bit more health left—up to a cap of 80%. This makes it great for taking down tanky enemies like Heavy Gunners or Nox units, especially for newer players who might struggle with raw DPS.
While Impact isn’t usually a top pick for damage scaling, it really shines when combined with certain mods like Internal Bleeding or Hemorrhage. These mods let you convert Impact procs into Slash status effects, which deal armor-bypassing bleed damage—turning a crowd-control tool into a deadly DPS source, especially in tough Steel Path missions.
Puncture
Puncture is all about weakening your enemies while giving you a critical edge—literally. It deals +50% bonus damage to Corpus and Orokin enemies, making it a great pick for missions against those factions. When you apply a Puncture status effect, it causes enemies to deal 40% less damage for 6 seconds, and each stack also adds +5% critical chance against them. This effect stacks up to 5 times, capping at a massive -80% enemy damage and +25% additive crit chance, which isn’t affected by mods.
While it’s not the flashiest damage type, Puncture really helps with survivability in tough fights and is especially effective when paired with crit-focused weapons. If you’re looking to make your target hit like a wet noodle while boosting your own damage output, Puncture adds a subtle but powerful advantage.
Slash
Slash is easily the strongest physical damage type in Warframe, and for good reason. It deals +50% bonus damage to Corpus and Orokin enemies, but its real power comes from its status effect. When triggered, Slash applies a bleed effect that deals true damage over time, completely bypassing enemy armor. These bleeds can stack infinitely (though only ten stacks are visually shown), making it one of the most effective ways to melt down even the tankiest foes.
Endgame players often build around Slash, using mods like Hunter Munitions to force frequent Slash procs on critical hits. When paired with Viral damage—which increases all damage dealt to health—the result is a deadly combo that shreds enemies regardless of their defenses. Whether you’re clearing Steel Path or tough boss fights, Slash-focused setups are a go-to choice for raw, scaling damage.
Elemental Damage Explained

In Warframe, there are four core elemental damage types—Cold, Electricity, Heat, and Toxin—that serve as the foundation for building more complex elemental combos. Each of these elements brings a unique status effect to the table and excels against specific enemy factions. Whether you’re slowing enemies with Cold, shocking groups with Electricity, burning through armor with Heat, or bypassing shields with Toxin, these elements add utility and power to your weapons. Mastering how and when to use these base elements is key to optimizing your builds for both damage output and crowd control across every mission type.
Cold
Cold damage in Warframe is a solid elemental type that’s perfect for slowing down enemies and boosting your crit-focused builds. It deals +50% bonus damage to Sentients but is less effective against Techrot enemies, taking a -50% penalty. What really makes Cold shine is its status effect—every proc slows the target’s action speed by 25%, including their movement, attack speed, and ability usage. On top of that, each stack increases the critical damage they take by +0.1x, capping at +1.0x at ten stacks. And when you hit that ten-stack threshold, the target is completely frozen for 3 seconds, giving you a perfect window to land heavy shots or reposition.
Cold is amazing for crowd control and works especially well in crit-heavy loadouts or support-style builds that aim to disrupt enemies and set them up for big damage. It’s not flashy, but it’s reliable—and freezing your enemies mid-fight never gets old.
Electricity
Electricity damage is one of the best elements to use early on, especially when going up against Corpus and Amalgam enemies, thanks to its +50% bonus damage against them. However, it falls flat against heavily armored Grineer units, so it’s not ideal for every faction. The status effect from Electricity procs stuns the target and causes them to release chain lightning, which hits enemies within a 3-meter radius—great for disrupting clustered enemies and softening them up.
While the damage from the shock effect isn’t huge on its own, Electricity really shines when paired with other elements like Gas, especially in crowd control-focused builds. For example, you can trap enemies in a Gas cloud while chaining Electricity procs to keep them stunned and stuck in place. It also works great with Rhino’s Roar, Gyre’s passive, or anything that boosts ability strength or damage output. If you build around it properly, Electricity can be a surprisingly strong element for both clearing mobs and controlling the battlefield.
Heat
Heat damage is widely considered one of the best elemental types in Warframe thanks to its versatility and effectiveness against almost every enemy type. It deals +50% bonus damage to Infested, making it ideal for slicing through their hordes, but it does suffer a -50% penalty against Kuva Grineer, so it’s not perfect for every faction. What makes Heat truly stand out, though, is its status effect—each proc ignites the target, dealing damage over time and stripping up to 50% of their armor.
The burn effect from Heat stacks infinitely, which means you can keep layering on more damage as long as you keep applying it. This makes it amazing for long fights or enemies with massive health pools. Heat also pairs extremely well with other elements: Viral amplifies the damage from Heat procs by boosting the target’s damage taken, and Corrosive can help strip any remaining armor even faster. Whether you’re running a crit build, a status build, or something hybrid, Heat fits in nearly every setup—and that’s why it shows up in so many endgame loadouts.
Toxin
Toxin damage is one of the most useful elemental types in Warframe thanks to its unique ability to bypass shields entirely. This makes it especially deadly against Corpus enemies, as it ignores their large shield pools and deals damage straight to health. Toxin also deals bonus damage to Narmer enemies (+50%), and its status effect applies a poison DoT that stacks infinitely, allowing for solid sustained damage over time.
Toxin shines in missions where you want to cut through shielded enemies quickly, and it’s a go-to element for many Corpus-focused builds. However, it’s important to avoid Toxin when fighting Infested, especially in higher-level content. Toxic Ancients can grant complete immunity to Toxin for nearby Infested, making it far less effective in those situations. Overall, if you’re planning a Corpus mission or need to shred shield-heavy targets fast, Toxin is one of the best elements you can bring.
All Combined Damage Types Explained
In Warframe, combined elemental damage types are created by mixing two of the basic elements—Cold, Electricity, Heat, and Toxin—on your weapon. These combinations result in six unique damage types: Blast, Corrosive, Gas, Magnetic, Radiation, and Viral. Each one brings its own strengths, status effects, and enemy-specific bonuses or penalties. These advanced elements are especially valuable in endgame builds because they offer stronger crowd control, armor stripping, shield shredding, or health multipliers. By understanding how these elements interact and choosing the right combo based on the enemy faction, you can seriously boost your weapon’s performance in any mission.
Blast
Blast damage is formed by combining Heat + Cold, and it adds an explosive twist to your weapon’s output. When Blast procs land on an enemy, they cause that target to explode after a 1.5-second delay, dealing 30% of your weapon’s base damage per stack. If you apply ten stacks, the enemy detonates instantly for a huge 300% base damage AoE, covering a 5-meter radius and clearing all Blast stacks in the process.
This makes Blast incredibly strong on high fire-rate or beam weapons that can stack status effects quickly—especially ones like the Tenet Glaxion, Torid (Incarnon form), or anything that fires rapidly. It’s particularly deadly against Infested Deimos and Corpus Amalgams, where the bonus damage shines. Blast is a fun way to turn single-target weapons into AoE powerhouses, and it’s perfect for clearing groups when you need raw crowd control with a bang.
Corrosive
Corrosive is made by combining Electricity + Toxin, and it’s one of the best damage types when dealing with heavily armored enemies like the Grineer. When Corrosive procs land on a target, they shred 26% of their armor per stack, capping out at 80% armor reduction after 10 stacks. If you equip Emerald Archon Shards, you can push that cap even higher, allowing full armor strip.
Corrosive hits especially hard against Grineer, Kuva Grineer, and Scaldra, with a bonus +50% damage. While it’s not used as often in endgame builds (which often rely on Viral + Heat combos), Corrosive still shines in Steel Path or mid-to-high-level missions where enemies have a lot of armor. It’s an excellent go-to if you want to break through defenses quickly and keep your damage consistent.
Gas
Gas damage comes from combining Heat + Toxin, and it creates a toxic cloud that deals damage over time in an area. When Gas procs, it spawns a 3-meter radius cloud at the target’s position that deals Gas DoT to anything nearby. If you manage to hit 10 stacks, the cloud expands to 6 meters, turning it into a solid AoE control tool. It’s especially strong against Infested (Deimos) and Techrot enemies, but weak against Scaldra.
While Gas isn’t commonly used in late-game meta due to its 10-stack limit (making it the only DoT in Warframe with a cap), it still has niche use cases. With Faction Mods, high base damage weapons, or synergy with frames like Baruuk, Gas can actually melt crowds—especially if you’re focusing on Condition Overload scaling or just need consistent AoE. It’s not always a top-tier pick, but with the right setup, Gas can definitely shine.
Magnetic
Magnetic damage is created by combining Cold + Toxin, and it’s a great pick when you’re up against shield-heavy enemies—especially the Corpus, Amalgams, or Techrot units. When Magnetic procs, it boosts all damage to shields and Overguard by 100% for 6 seconds, stacking up to 325% bonus damage at 10 stacks. It also prevents shields from regenerating and even drains Warframe energy when applied to players.
While Toxin is often preferred in endgame due to its shield-bypassing properties, Magnetic still has value in fights where enemies are loaded with Overguard, like Eximus units or certain boss encounters. If you’re running a high-rate-of-fire weapon or dealing with content where breaking shields quickly is crucial, Magnetic can be a powerful alternative. It’s not always meta, but in the right situation, it can carry your team through waves of shielded enemies with ease.
Radiation
Radiation is formed by mixing Heat + Electricity, and it’s known for turning enemies against each other. When Radiation procs, it causes targets to become confused, making them attack their own allies for 100% damage, scaling up to 550% at 10 stacks. It also disables any aura effects the enemy might have, which is perfect for shutting down Ancient Healers, Eximus units, or other high-priority threats that buff nearby mobs. It deals bonus damage to Sentients and Murmur, but it’s less effective against Orokin enemies.
While you won’t see Radiation in most top-tier meta builds, it still has its uses. If you’re running crowd-control-heavy gear or looking to cause chaos in grouped enemies, Radiation can add a lot of utility. It’s also a solid pick for Nyx players who want to boost Mind Control damage or anyone looking to weaken dangerous support mobs by making them backstab their team. Radiation may not always be the go-to, but it’s one of the most fun and tactical status effects in the game.
Viral
Viral is created by combining Toxin + Cold, and it’s one of the strongest elemental combos in Warframe. When applied, it causes enemies to take 100% more damage to their health, scaling up to 325% at 10 stacks. While its raw damage modifiers aren’t the highest—it’s only strong against Orokin and weaker against Deimos Infested and Murmur—the status effect makes it an absolute staple in high-level content.
Viral shines when paired with Slash procs or armor stripping, letting you melt through enemies with ease. It’s the go-to choice in most Steel Path and endgame builds, especially when you’re running frames or weapons that pump out consistent status effects. If you’re looking to boost your DPS without overcomplicating your setup, Viral should be at the top of your list.
Void And True Damage Explained
Void and True damage are two of the rarest and most specialized damage types in Warframe, and they work a bit differently from your usual elements. True damage completely ignores shields and armor, hitting directly against enemy health with no damage modifiers—making it perfect for punching through tanky enemies without worrying about defenses. It’s typically found on specific Warframe abilities and some weapons or effects.
Void
Void damage, on the other hand, is mostly tied to Operator attacks and certain Warframe abilities. It’s super effective against Overguard and Zariman enemies, and it also resets Sentient resistances, which is huge when dealing with those late-game enemies. Void also has a unique magnetic dome effect that pulls projectiles inward, making it useful for landing multiple shots in chaotic fights. While you won’t build around True or Void damage the same way you do with elemental types, knowing how and when to use them can make a huge difference—especially in high-tier content or against specific factions.
Void damage is a unique and powerful type of damage in Warframe, mainly tied to Operator Amps and the Xaku Warframe. It deals +50% extra damage to Overguard, making it extremely effective against Eximus units and enemies with this special third health bar. Its status effect creates a magnetizing bubble at the point of impact, causing punch-through projectiles to ricochet inside and increase your chance of landing follow-up hits or headshots.
One of Void’s biggest advantages is that it removes Sentient resistances, allowing you to deal consistent damage to enemies that normally adapt to repeated attacks. This makes Void damage essential when facing Sentients or Eidolons, especially since only Operator Amps can break Eidolon shields. While it’s not something you’ll build into most weapons, Void damage is key to surviving certain high-level encounters and should be mastered for late-game content.
True Damage
True Damage is one of the most straightforward yet powerful damage types in Warframe. It doesn’t come with any fancy status effects or elemental bonuses—but what it does offer is pure, unfiltered damage that completely ignores armor. That means enemies with huge armor pools like Grineer heavies or Steel Path bosses take the full brunt of it, no reductions.
This type of damage isn’t something you mod for—it’s usually baked into specific abilities or actions. You’ll mostly see True Damage in melee finishers, certain Warframe abilities like Ash’s Blade Storm, or Slash procs from status effects. While it doesn’t show up in your weapon stats, it plays a critical role in endgame builds and high-level content where enemies would otherwise soak up massive amounts of damage. If you’re looking to bypass tanky foes and deal raw health damage, True Damage is your best friend.
Conclusion
True Damage is one of the most straightforward yet powerful damage types in Warframe. It doesn’t come with any fancy status effects or elemental bonuses—but what it does offer is pure, unfiltered damage that completely ignores armor. That means enemies with huge armor pools like Grineer heavies or Steel Path bosses take the full brunt of it, no reductions.
This type of damage isn’t something you mod for—it’s usually baked into specific abilities or actions. You’ll mostly see True Damage in melee finishers, certain Warframe abilities like Ash’s Blade Storm, or Slash procs from status effects. While it doesn’t show up in your weapon stats, it plays a critical role in endgame builds and high-level content where enemies would otherwise soak up massive amounts of damage. If you’re looking to bypass tanky foes and deal raw health damage, True Damage is your best friend.
Posted On: April 19th, 2025
Recent Articles


💬 Need help?
Our 1v9 support team is available 24/7 to help you with any questions or issues you may have.
support@1v9.gg
Loading...
1v9.gg is not endorsed or affiliated by any game developers or publishers.
2025 1v9, All Rights Reserved, Created By NightDev