


How To Bind Jump Throw In CS2
In Counter-Strike 2, mastering utility usage is key to gaining an advantage over your opponents, and one of the most useful mechanics to learn is the jump throw bind. This allows you to execute precise grenade lineups with perfect consistency, making it essential for smokes, flashes, and molotovs that require a set distance and trajectory. Unlike manual jump throws, which can be inconsistent, a jump throw bind ensures your grenade is released at the exact moment you jump, helping you land pixel-perfect lineups every time. In this guide, we’ll walk you through how to set up a jump throw bind in CS2, so you can execute your utility like a pro.
How To Make A CS2 Jump Throw Bind
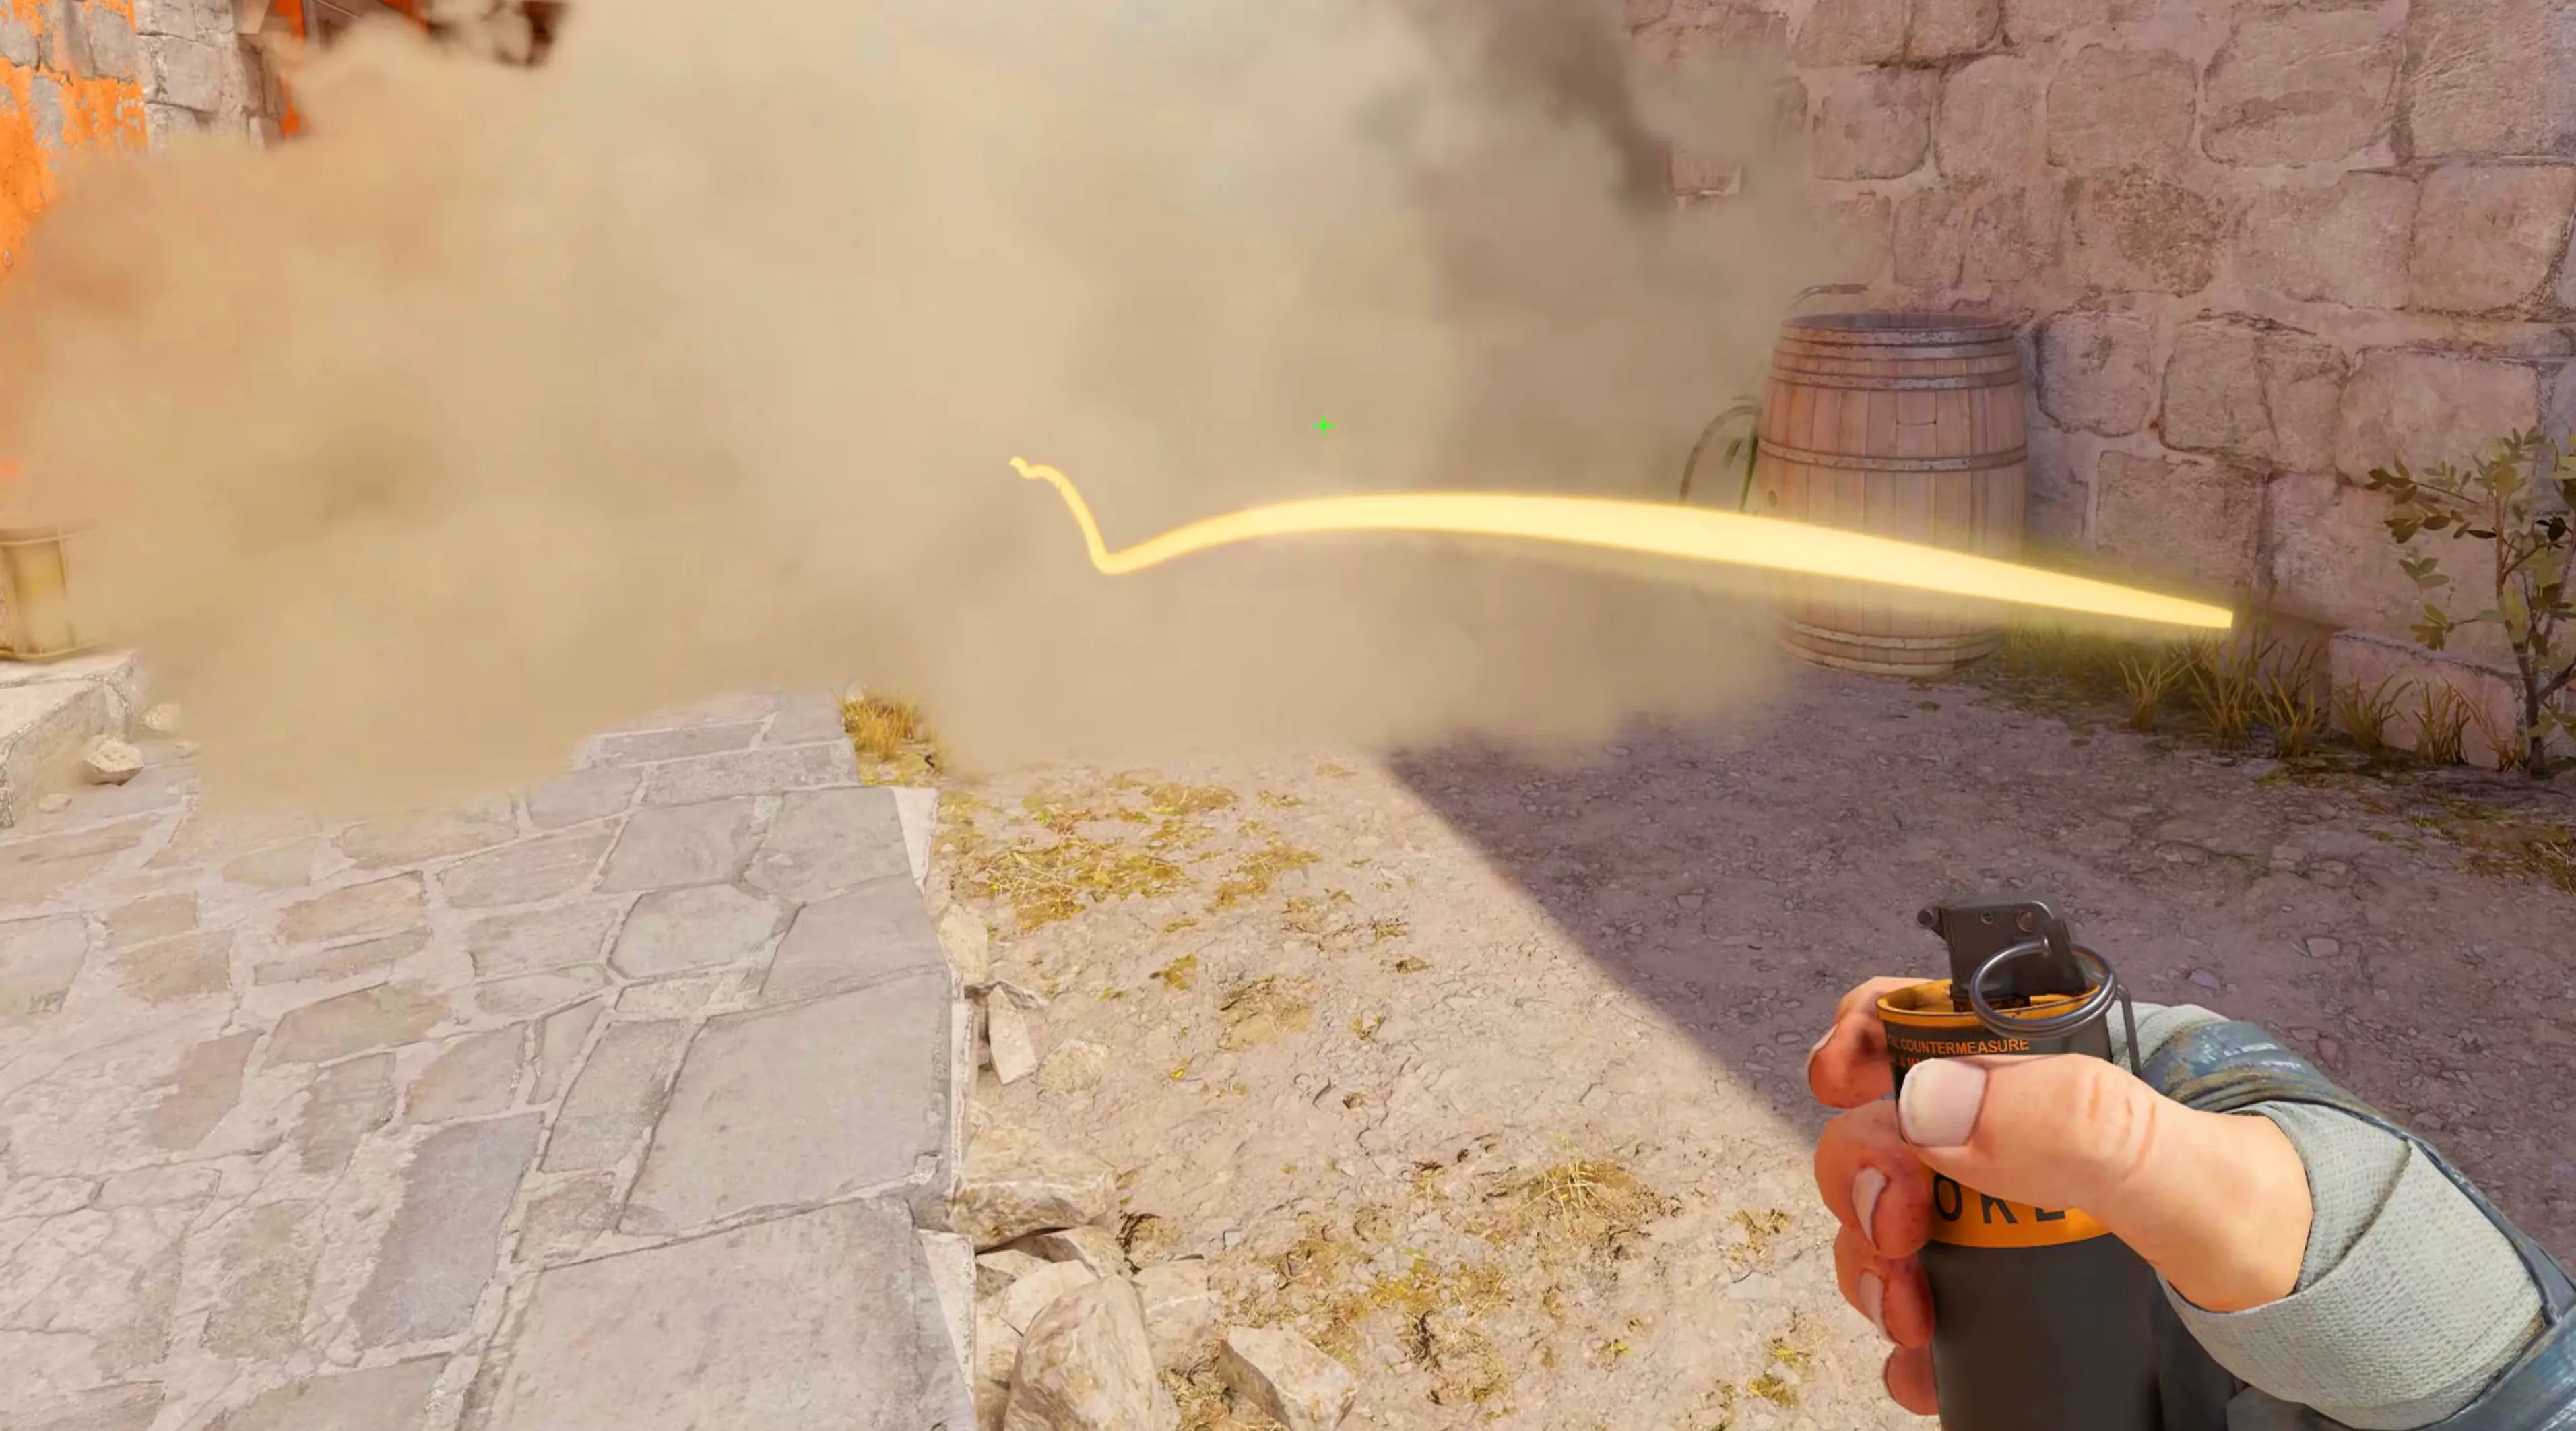
A jump throw bind is an essential tool in Counter-Strike 2, allowing players to execute consistent and precise grenade throws while jumping. This technique is widely used for landing perfect smokes, flashes, and molotovs across the map. Follow these steps to set up your jump throw bind in CS2 for smoother and more effective utility usage.
1. Enable the Developer Console
Before setting up the bind, make sure the developer console is enabled in your game settings:
• Open CS2 Settings
• Navigate to Game Settings
• Find Enable Developer Console (~) and set it to Yes
2. Bind a Key for the Jump Throw
Now, open the developer console by pressing the “~” key and enter the following command:
bind [key] “+jump; -attack; -jump”
Replace [key] with your preferred key (e.g., h, v, or mouse4). This bind will ensure that every time you press the key, your character will jump and release the grenade simultaneously, leading to a perfectly executed jump throw every time.
3. Save Your Bind Permanently
To ensure that your bind is saved even after restarting CS2, follow these steps:
• Go to your CS2 configuration folder at:
C:\Program Files (x86)\Steam\steamapps\common\Counter-Strike Global Offensive\csgo\cfg
• Locate or create a file named “autoexec.cfg” using a text editor like Notepad.
• Add the jump throw bind command to this file:
bind [key] “+jump; -attack; -jump”
• Save and close the file.
This ensures that your jump throw bind remains active even after restarting the game.
4. Test Your Jump Throw Bind
Once you’ve set up your bind, launch CS2 and join a game to test it:
• Select a grenade (smoke, flashbang, or molotov).
• Stand in a spot where a jump throw lineup is needed.
• Press your jump throw bind key and watch as your grenade releases at the perfect timing.
By following these steps, you’ll improve your utility precision in Counter-Strike 2, helping you execute lineups like a pro. Having a consistent jump throw bind is a must-have for competitive play, so be sure to set it up today!
Tips for Mastering the Jump Throw Bind in CS2

Now that you’ve set up your jump throw bind in Counter-Strike 2, it’s time to maximize its effectiveness. Simply having the bind isn’t enough—you need to practice and refine your grenade throws to gain a competitive edge. Here are some key tips to make the most out of this tool:
1. Practice Consistently
Jump throws require precision, so spend time practicing in offline mode or on workshop training maps. The more you repeat the mechanics, the better your muscle memory will become, allowing for flawless execution in actual matches.
2. Learn the Best Grenade Spots
Not all jump throws are useful in every situation. Take the time to study pro matches, guides, or custom maps to find the most effective smoke, flash, and molotov lineups. Knowing where to aim and throw will ensure your utility is impactful in real games.
3. Adjust the Bind to Your Comfort
If the key you initially chose for the bind feels awkward or uncomfortable, don’t hesitate to rebind it to a more convenient key. You want it to be easily accessible during intense rounds without disrupting your movement or aim.
4. Minimize Lag for Accuracy
Lag can negatively impact your jump throws, leading to mistimed grenades or failed lineups. Ensure your game runs smoothly by optimizing your FPS, reducing background applications, and using a stable internet connection. A lag-free experience will help you land perfect grenades every time.
By practicing regularly, learning the best lineups, fine-tuning your bind, and ensuring a smooth gameplay experience, you’ll maximize the effectiveness of your jump throw bind in CS2. With time, this skill will become second nature, giving you a tactical advantage in competitive matches.
FAQs
Can You Bind a Jump Throw in CS2?
Yes, Counter-Strike 2 allows you to set up a jump throw bind using the developer console. By configuring a custom bind, you can ensure that your grenades are released at the exact moment you jump, resulting in more accurate and consistent throws. This is especially beneficial for executing precise smokes, flashes, and molotovs in competitive matches.
How to Create a Jump Throw Bind in CS2?
To set up a jump throw bind in Counter-Strike 2, open the developer console by pressing “~”, then enter the following command:
bind [key] “+jump; -attack; -jump”
Replace [key] with your preferred key (e.g., h, v, or mouse4). To make sure the bind remains active after restarting the game, add this command to your autoexec.cfg file in the CS2 config folder. This ensures you always have a consistent and reliable jump throw for executing perfect grenade lineups.
How to Bind Spacebar and Scroll Wheel to Jump in CS2?
To bind both the spacebar and scroll wheel to jump in Counter-Strike 2, open the developer console by pressing “~” and enter the following commands: bind "space" "+jump", bind "mwheelup" "+jump", and bind "mwheeldown" "+jump". This setup allows you to jump using either the spacebar or by scrolling up or down, making movement and bunny hopping much smoother, which is why many pro players prefer this configuration.
How to make binds in CS2?
To create binds in Counter-Strike 2, open the developer console by pressing “~” and enter the command in the format: bind [key] "[command]", replacing [key] with the key you want to use and [command] with the desired action. For example, bind h "+jump" would make the H key trigger a jump. To ensure your binds remain active after restarting the game, add them to the autoexec.cfg file in the CS2 config folder. This way, your custom settings will automatically load every time you play.
Conclusion
Mastering the jump throw bind in Counter-Strike 2 can give you a huge advantage when it comes to consistent grenade lineups and strategic utility usage. By setting up the bind correctly and practicing your throws, you’ll be able to execute precise smokes, flashes, and molotovs with ease. Whether you’re playing casually or competing at a high level, having a reliable jump throw bind can make a big difference in your gameplay. Now that you know how to set it up and optimize it, you’re ready to take your grenade mechanics to the next level in CS2!
Posted On: March 22nd, 2025
Recent Articles


💬 Need help?
Our 1v9 support team is available 24/7 to help you with any questions or issues you may have.
support@1v9.gg
Loading...
1v9.gg is not endorsed or affiliated by any game developers or publishers.
2025 1v9, All Rights Reserved, Created By NightDev