


8 Best Low-Cost Decks In Clash Royale
Building a strong deck in Clash Royale isn’t just about cramming it full of expensive, high-cost cards. In fact, some of the most effective strategies come from low-cost decks that let you cycle quickly and keep constant pressure on your opponent. While new players might struggle at first with timing and placement, once you understand the flow of the game, cheap decks can be extremely hard to stop. A classic example is the Hog Cycle deck, which has been frustrating players for years thanks to its speed and relentless pressure. In this guide, we’ll break down the best low-cost decks in Clash Royale that not only save Elixir but also give you the tools to outplay your opponents.
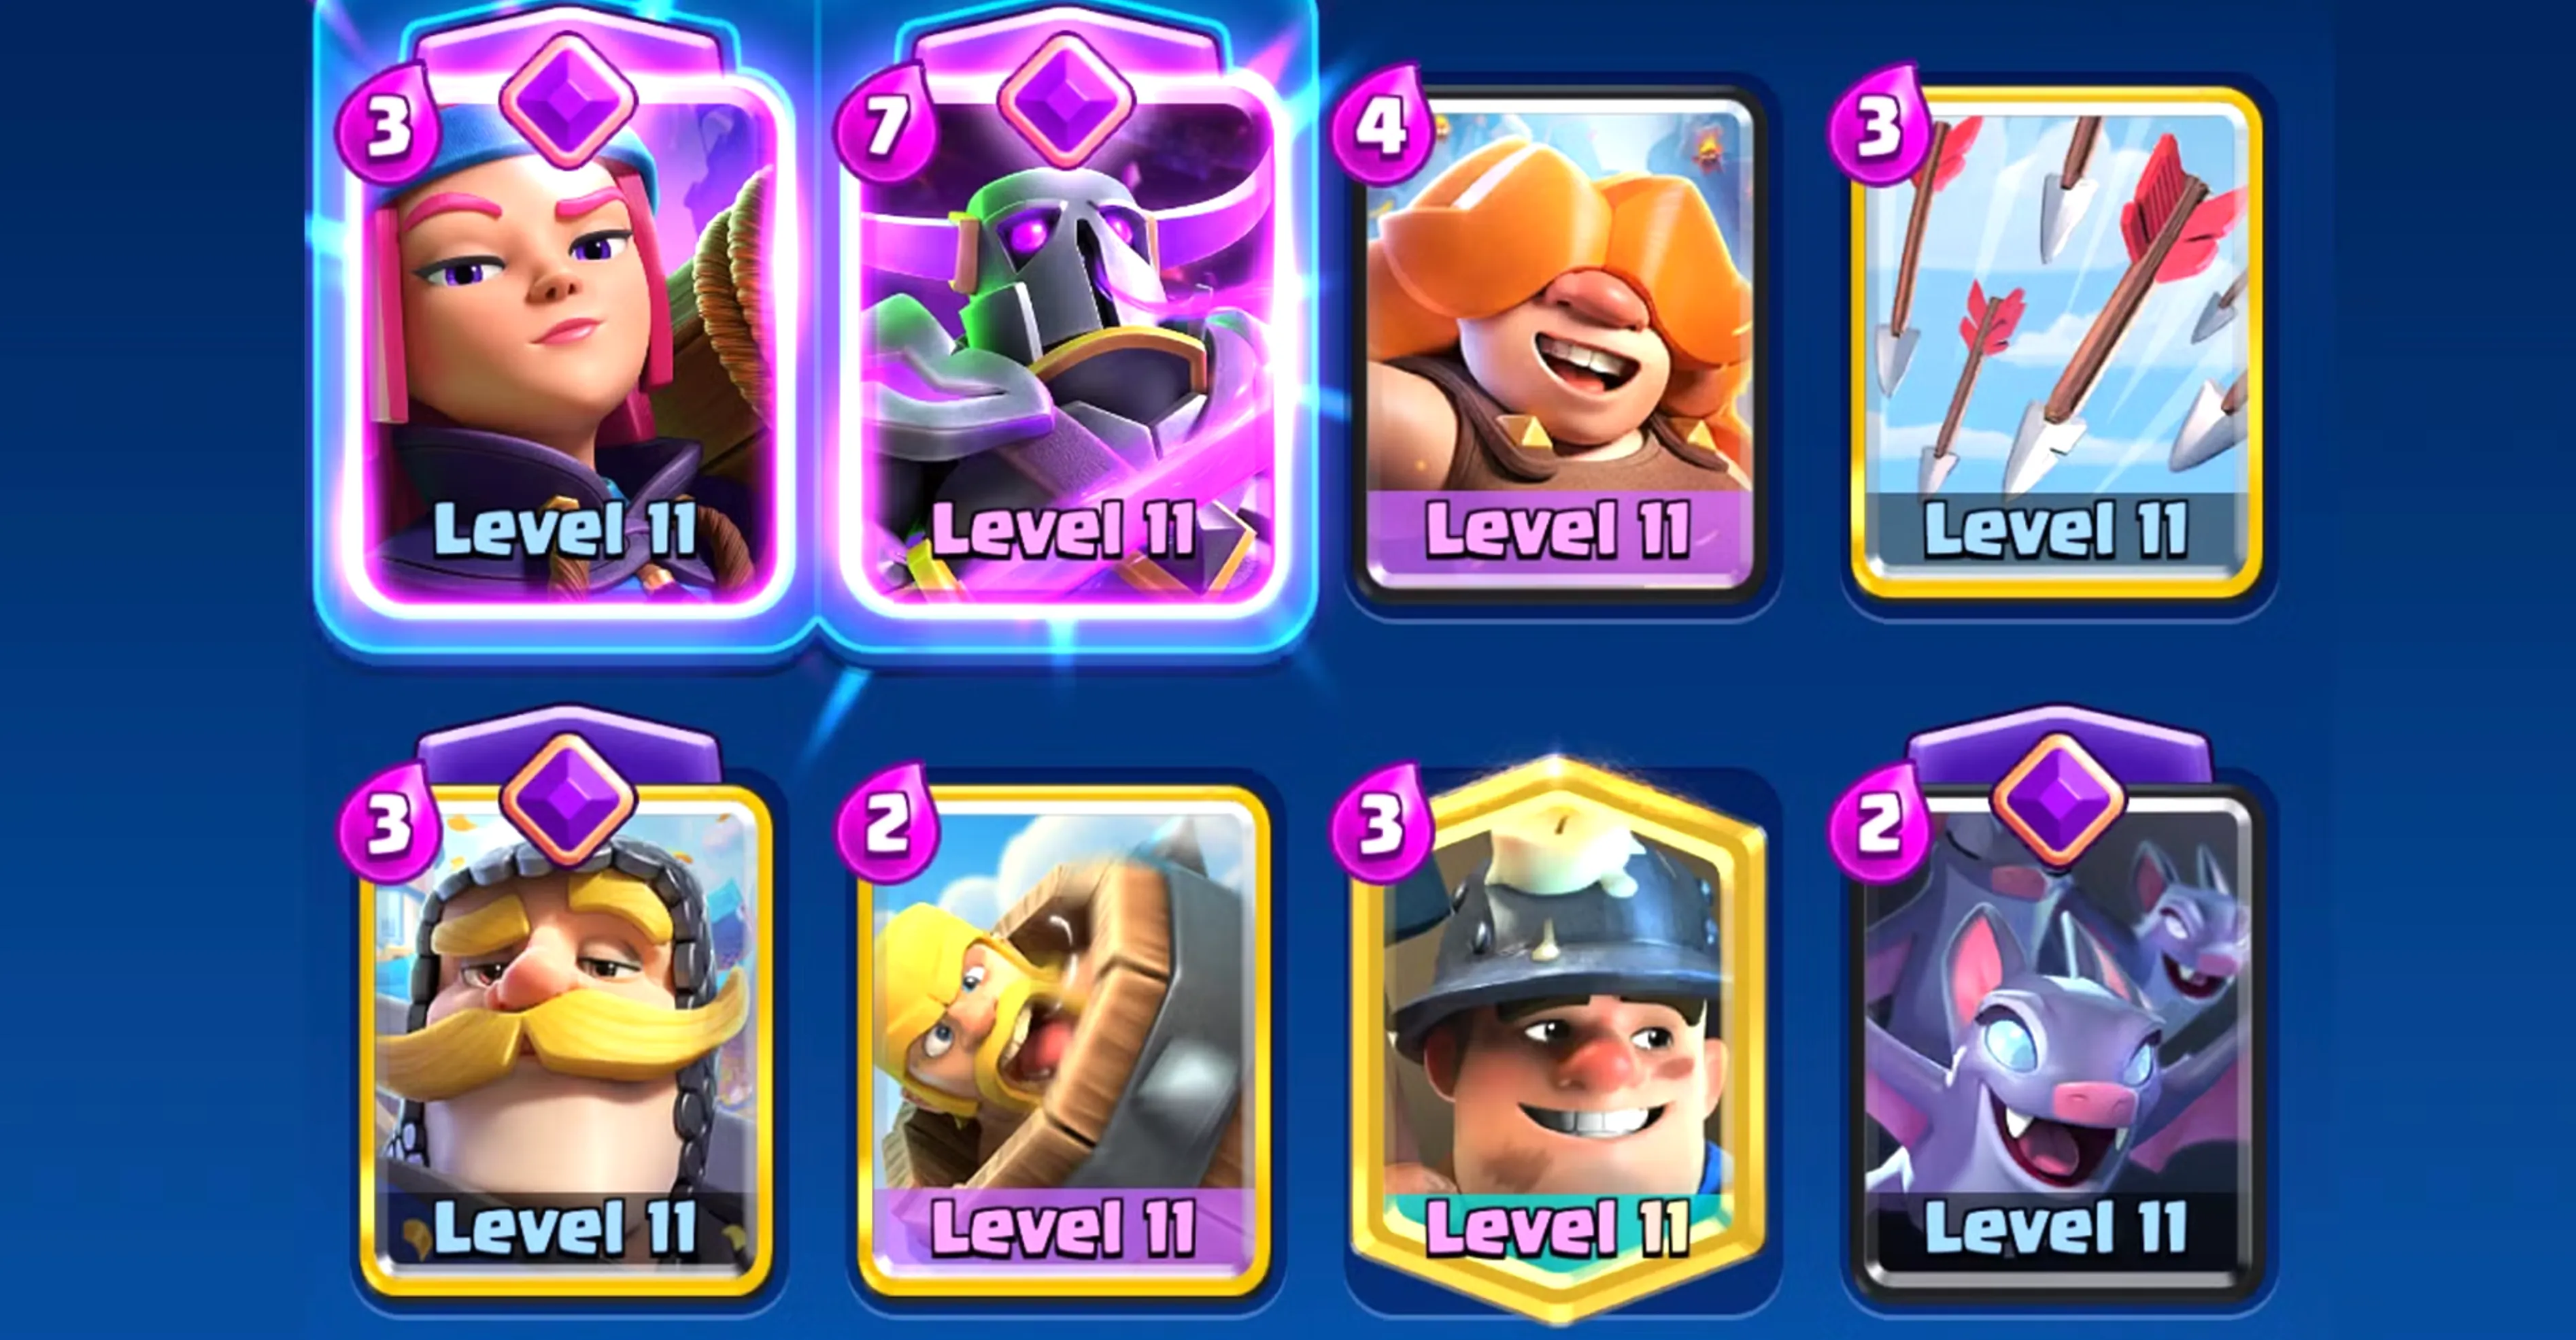
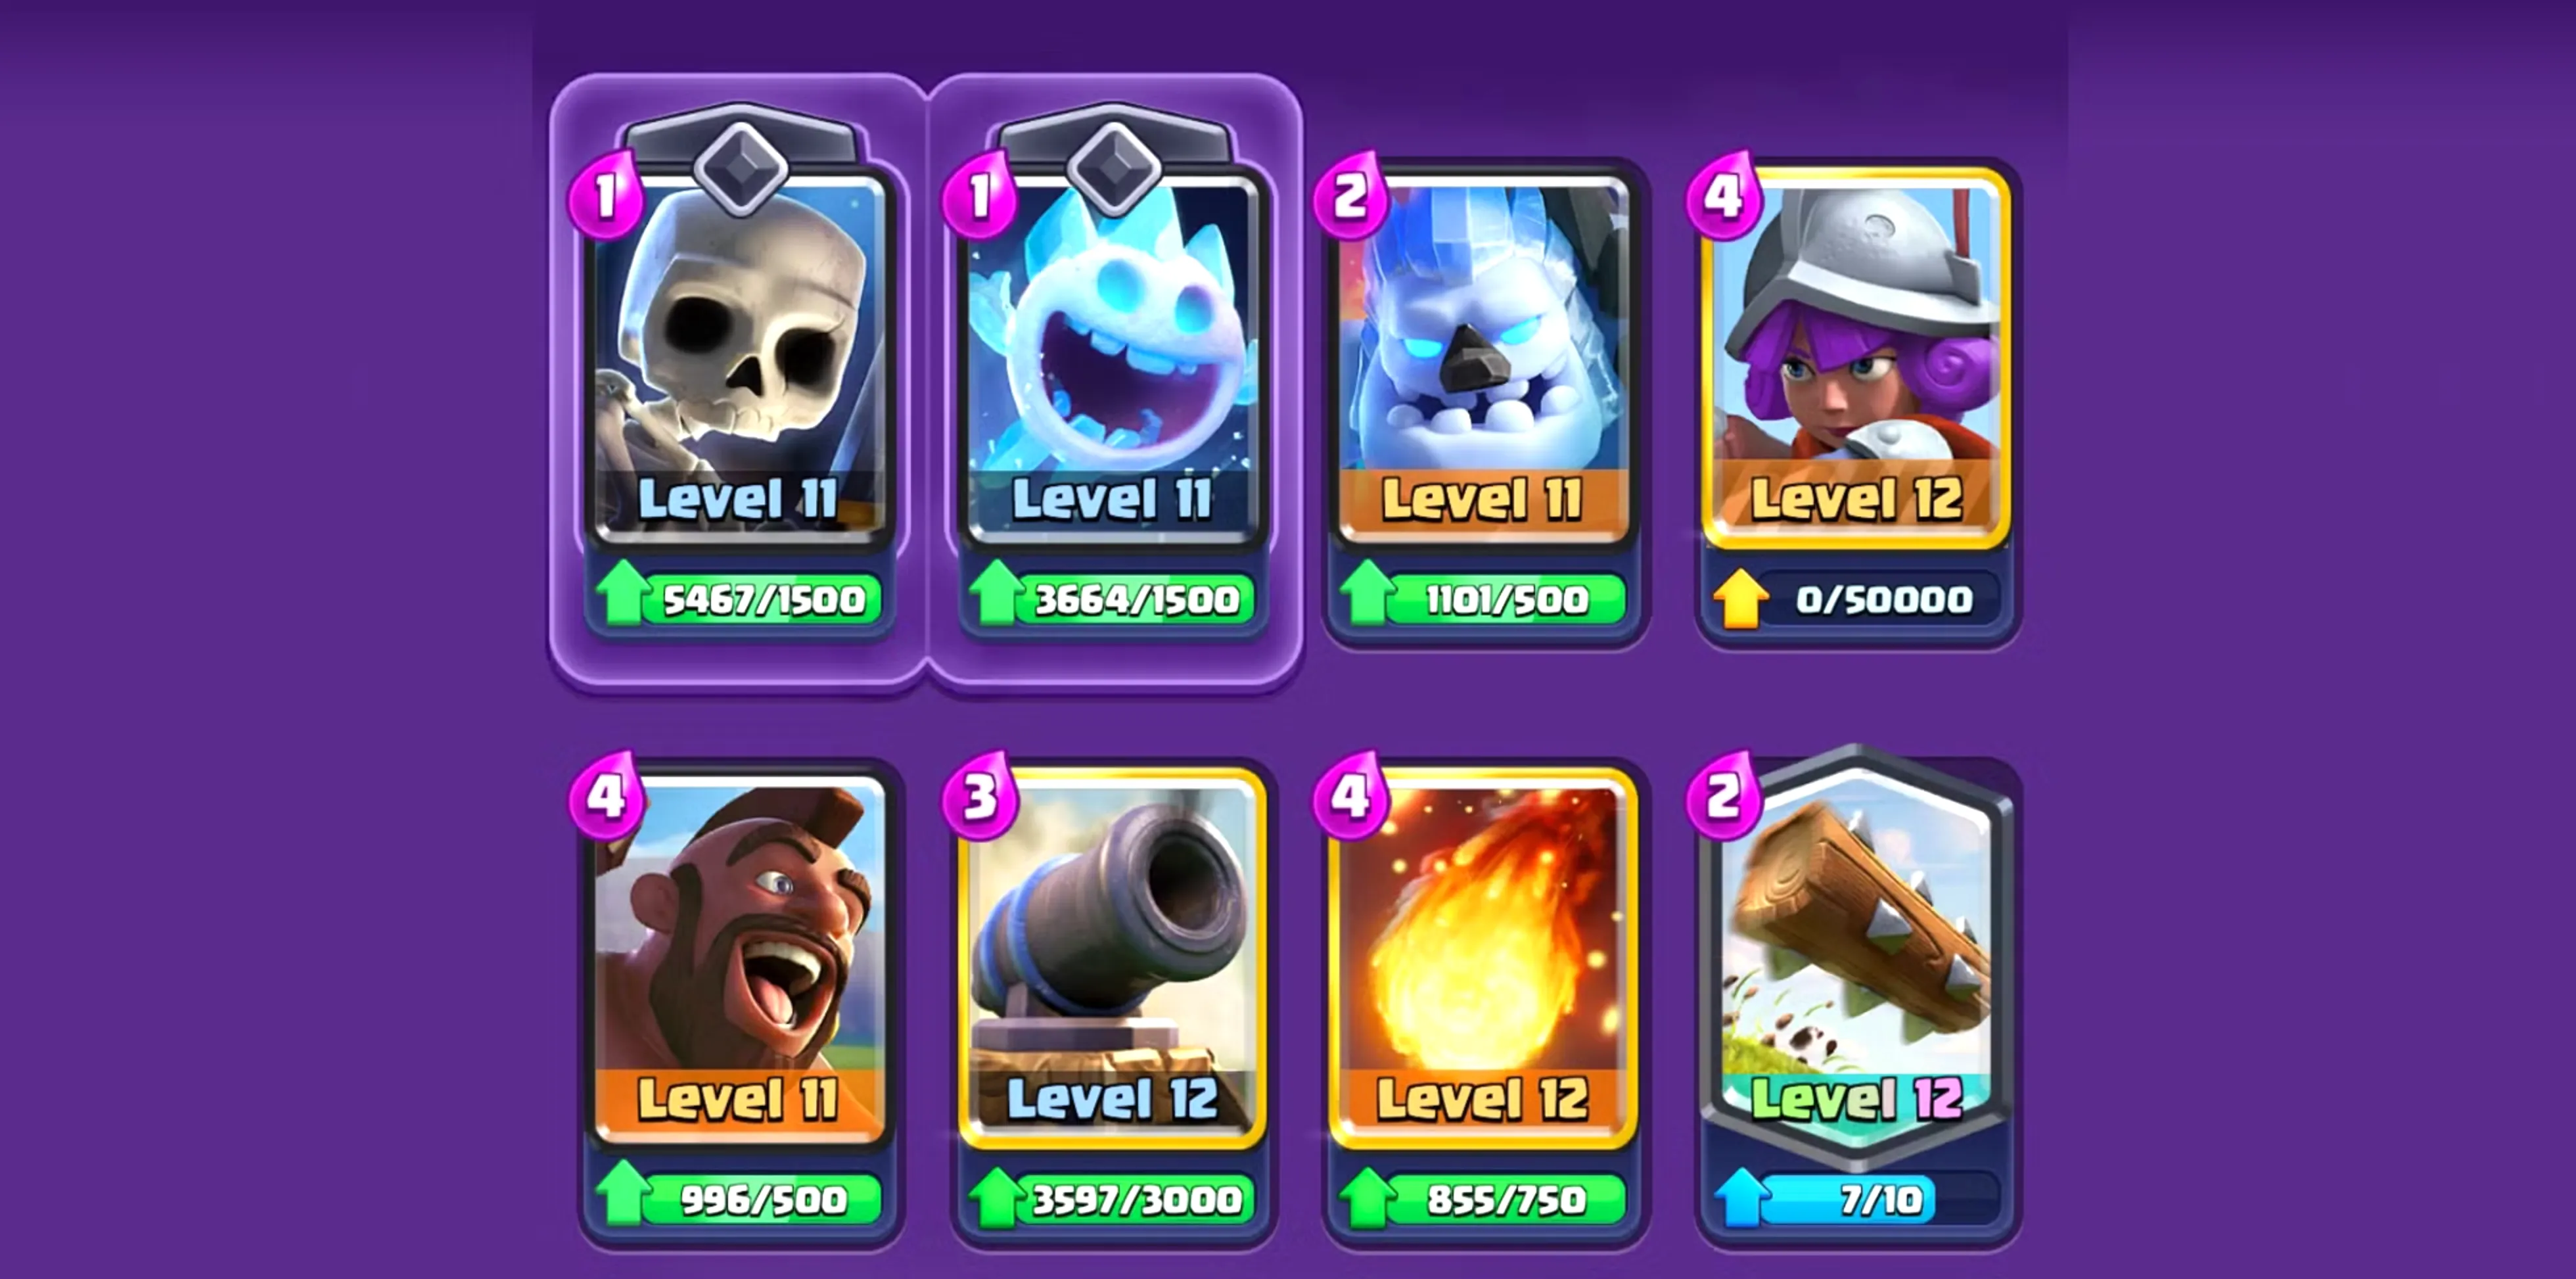
#8: Mega Knight and Pekka Deck
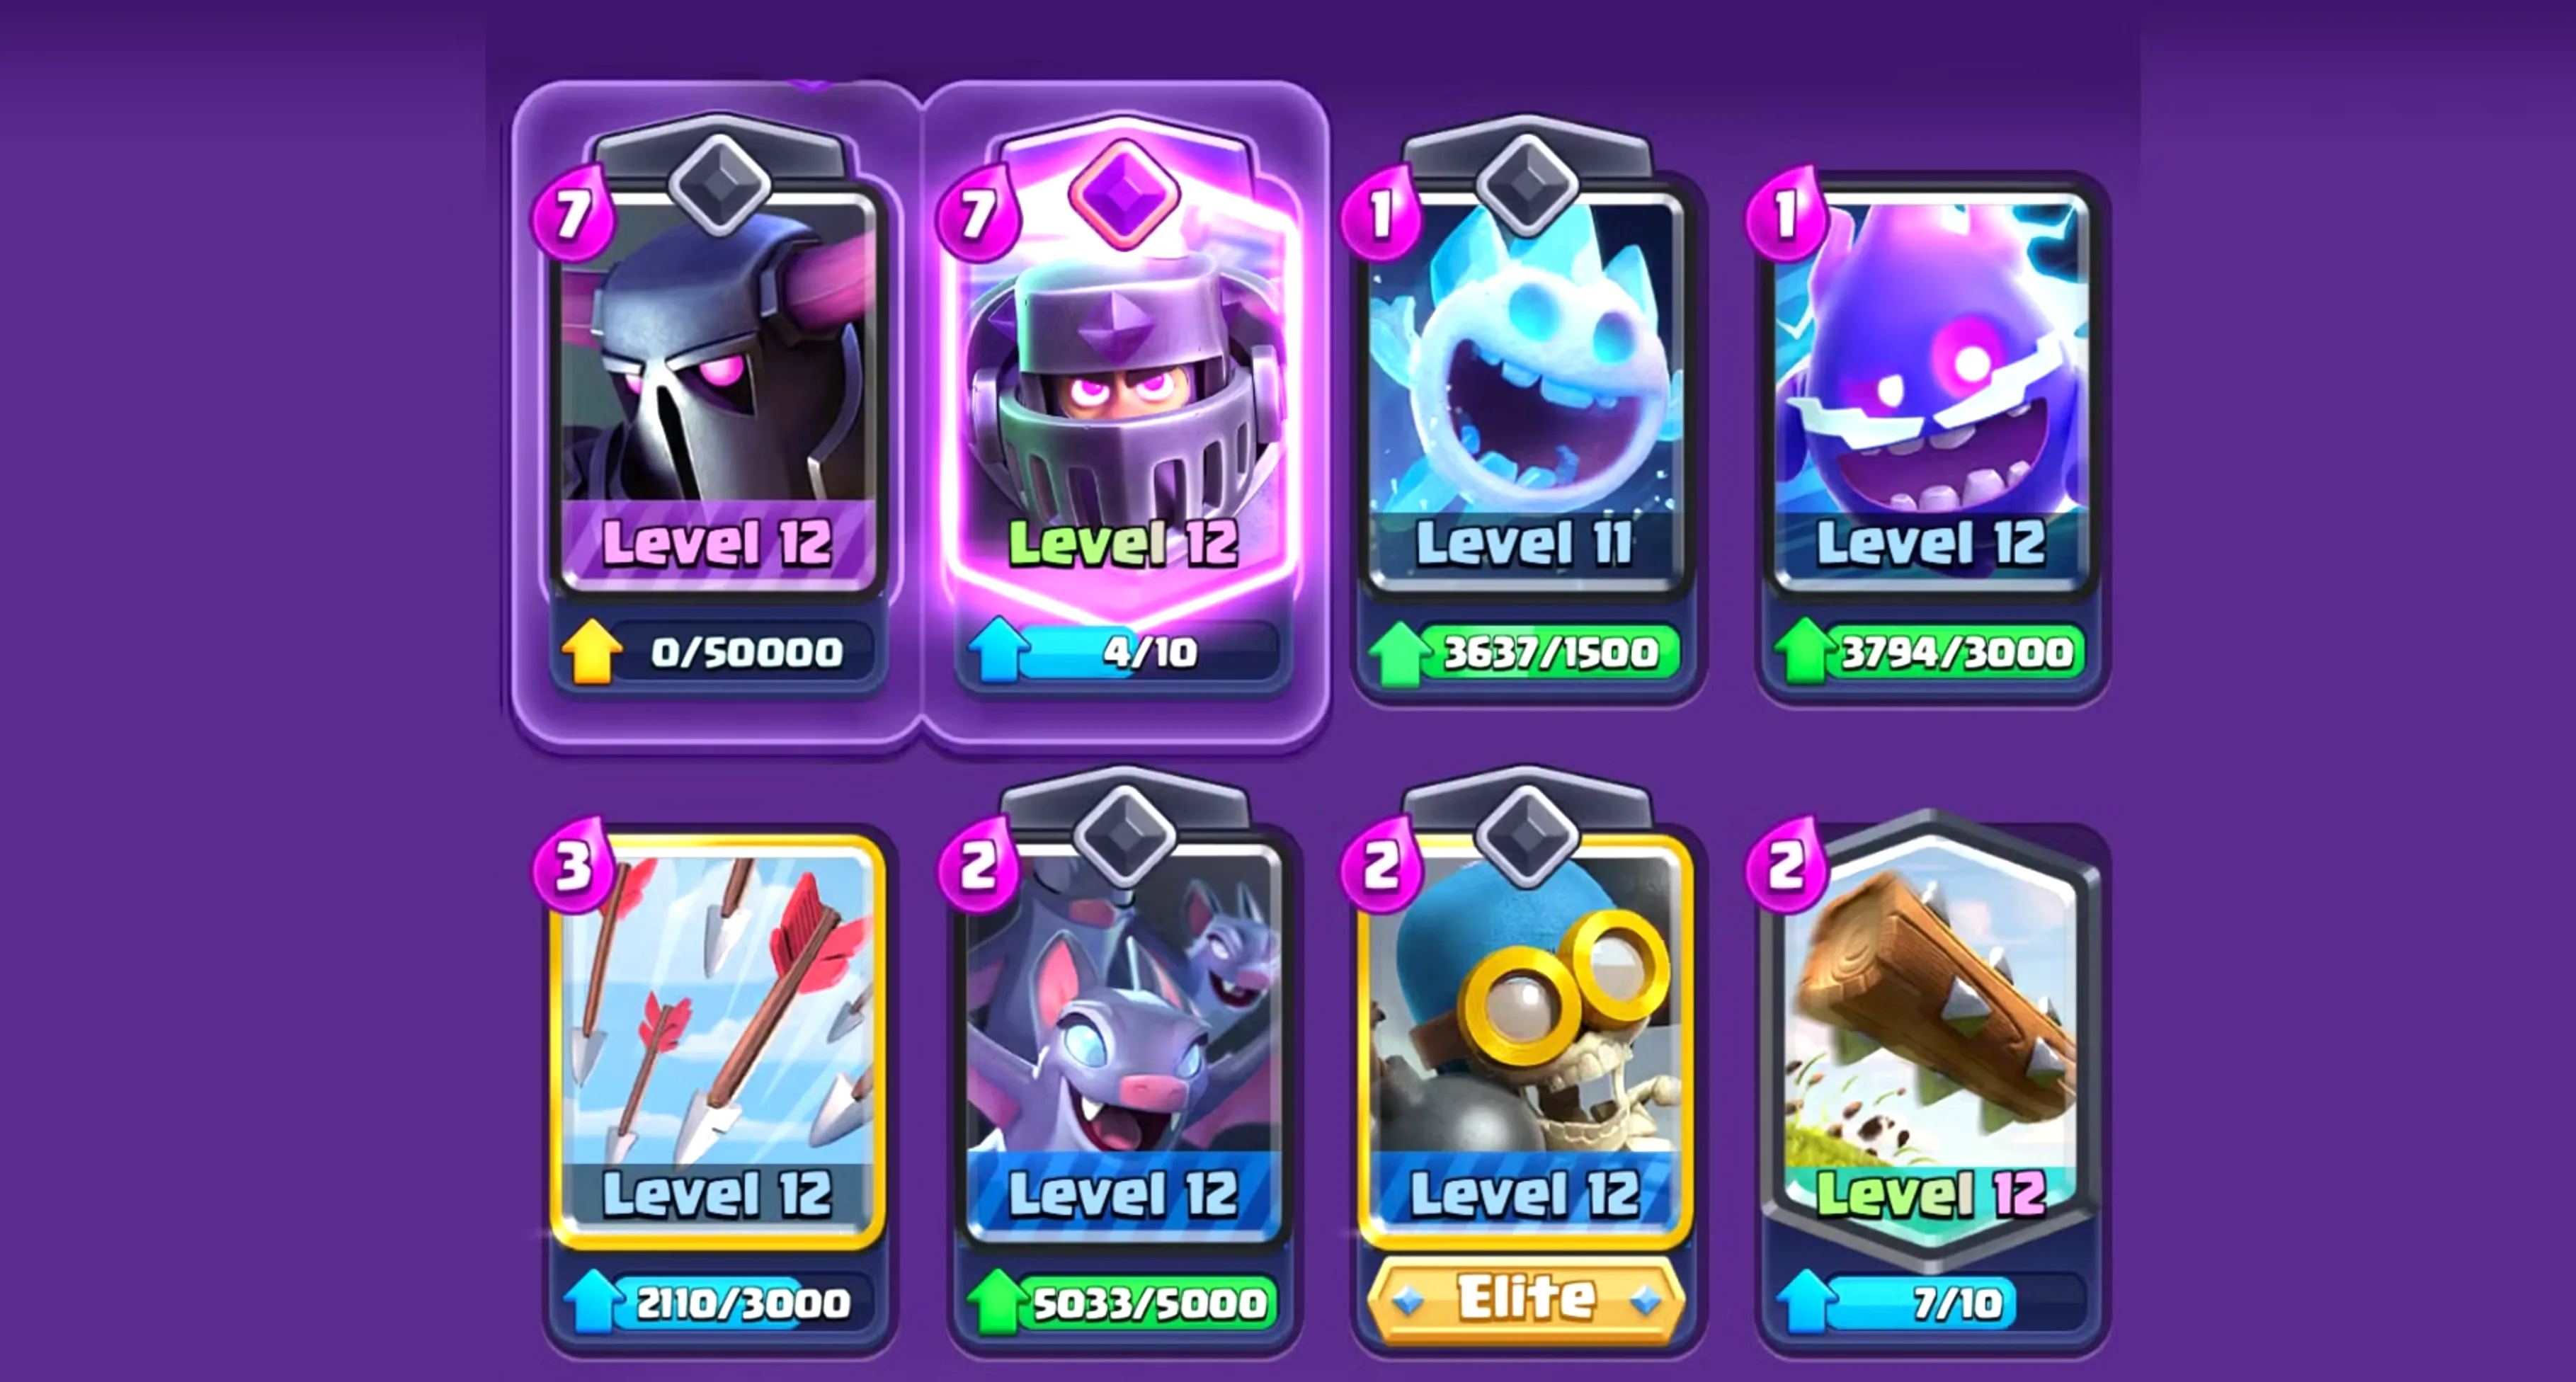
Average Elixir Cost: 3.1
• Pekka Evolution (7 Elixir)
• Mega Knight Evolution (7 Elixir)
• Ice Spirit (1 Elixir)
• Electro Spirit (1 Elixir)
• Arrows (3 Elixir)
• Bats (2 Elixir)
• Bomber (2 Elixir)
• The Log (2 Elixir)
This deck is built around two of the heaviest hitters in Clash Royale—Pekka and Mega Knight—both made even scarier with their Evolutions. On their own, these units are already tough to bring down, but with proper support, they can bulldoze through almost any defense. The supporting cards here are cheap cycle units like Ice Spirit, Electro Spirit, Bats, and Bomber, which not only help defend but also buy you time to recharge Elixir for another tank drop. Spells like Arrows and The Log give you reliable answers to swarms, making sure your win conditions don’t get overwhelmed.
The main strategy is simple: always keep one of your big tanks on the field. If both Pekka and Mega Knight are eliminated without backup, you’ll find yourself starved for Elixir and open to counterattacks. However, if played correctly, this deck snowballs hard and can quickly turn the tide in your favor.
#7: Archer Queen and Firecracker Deck
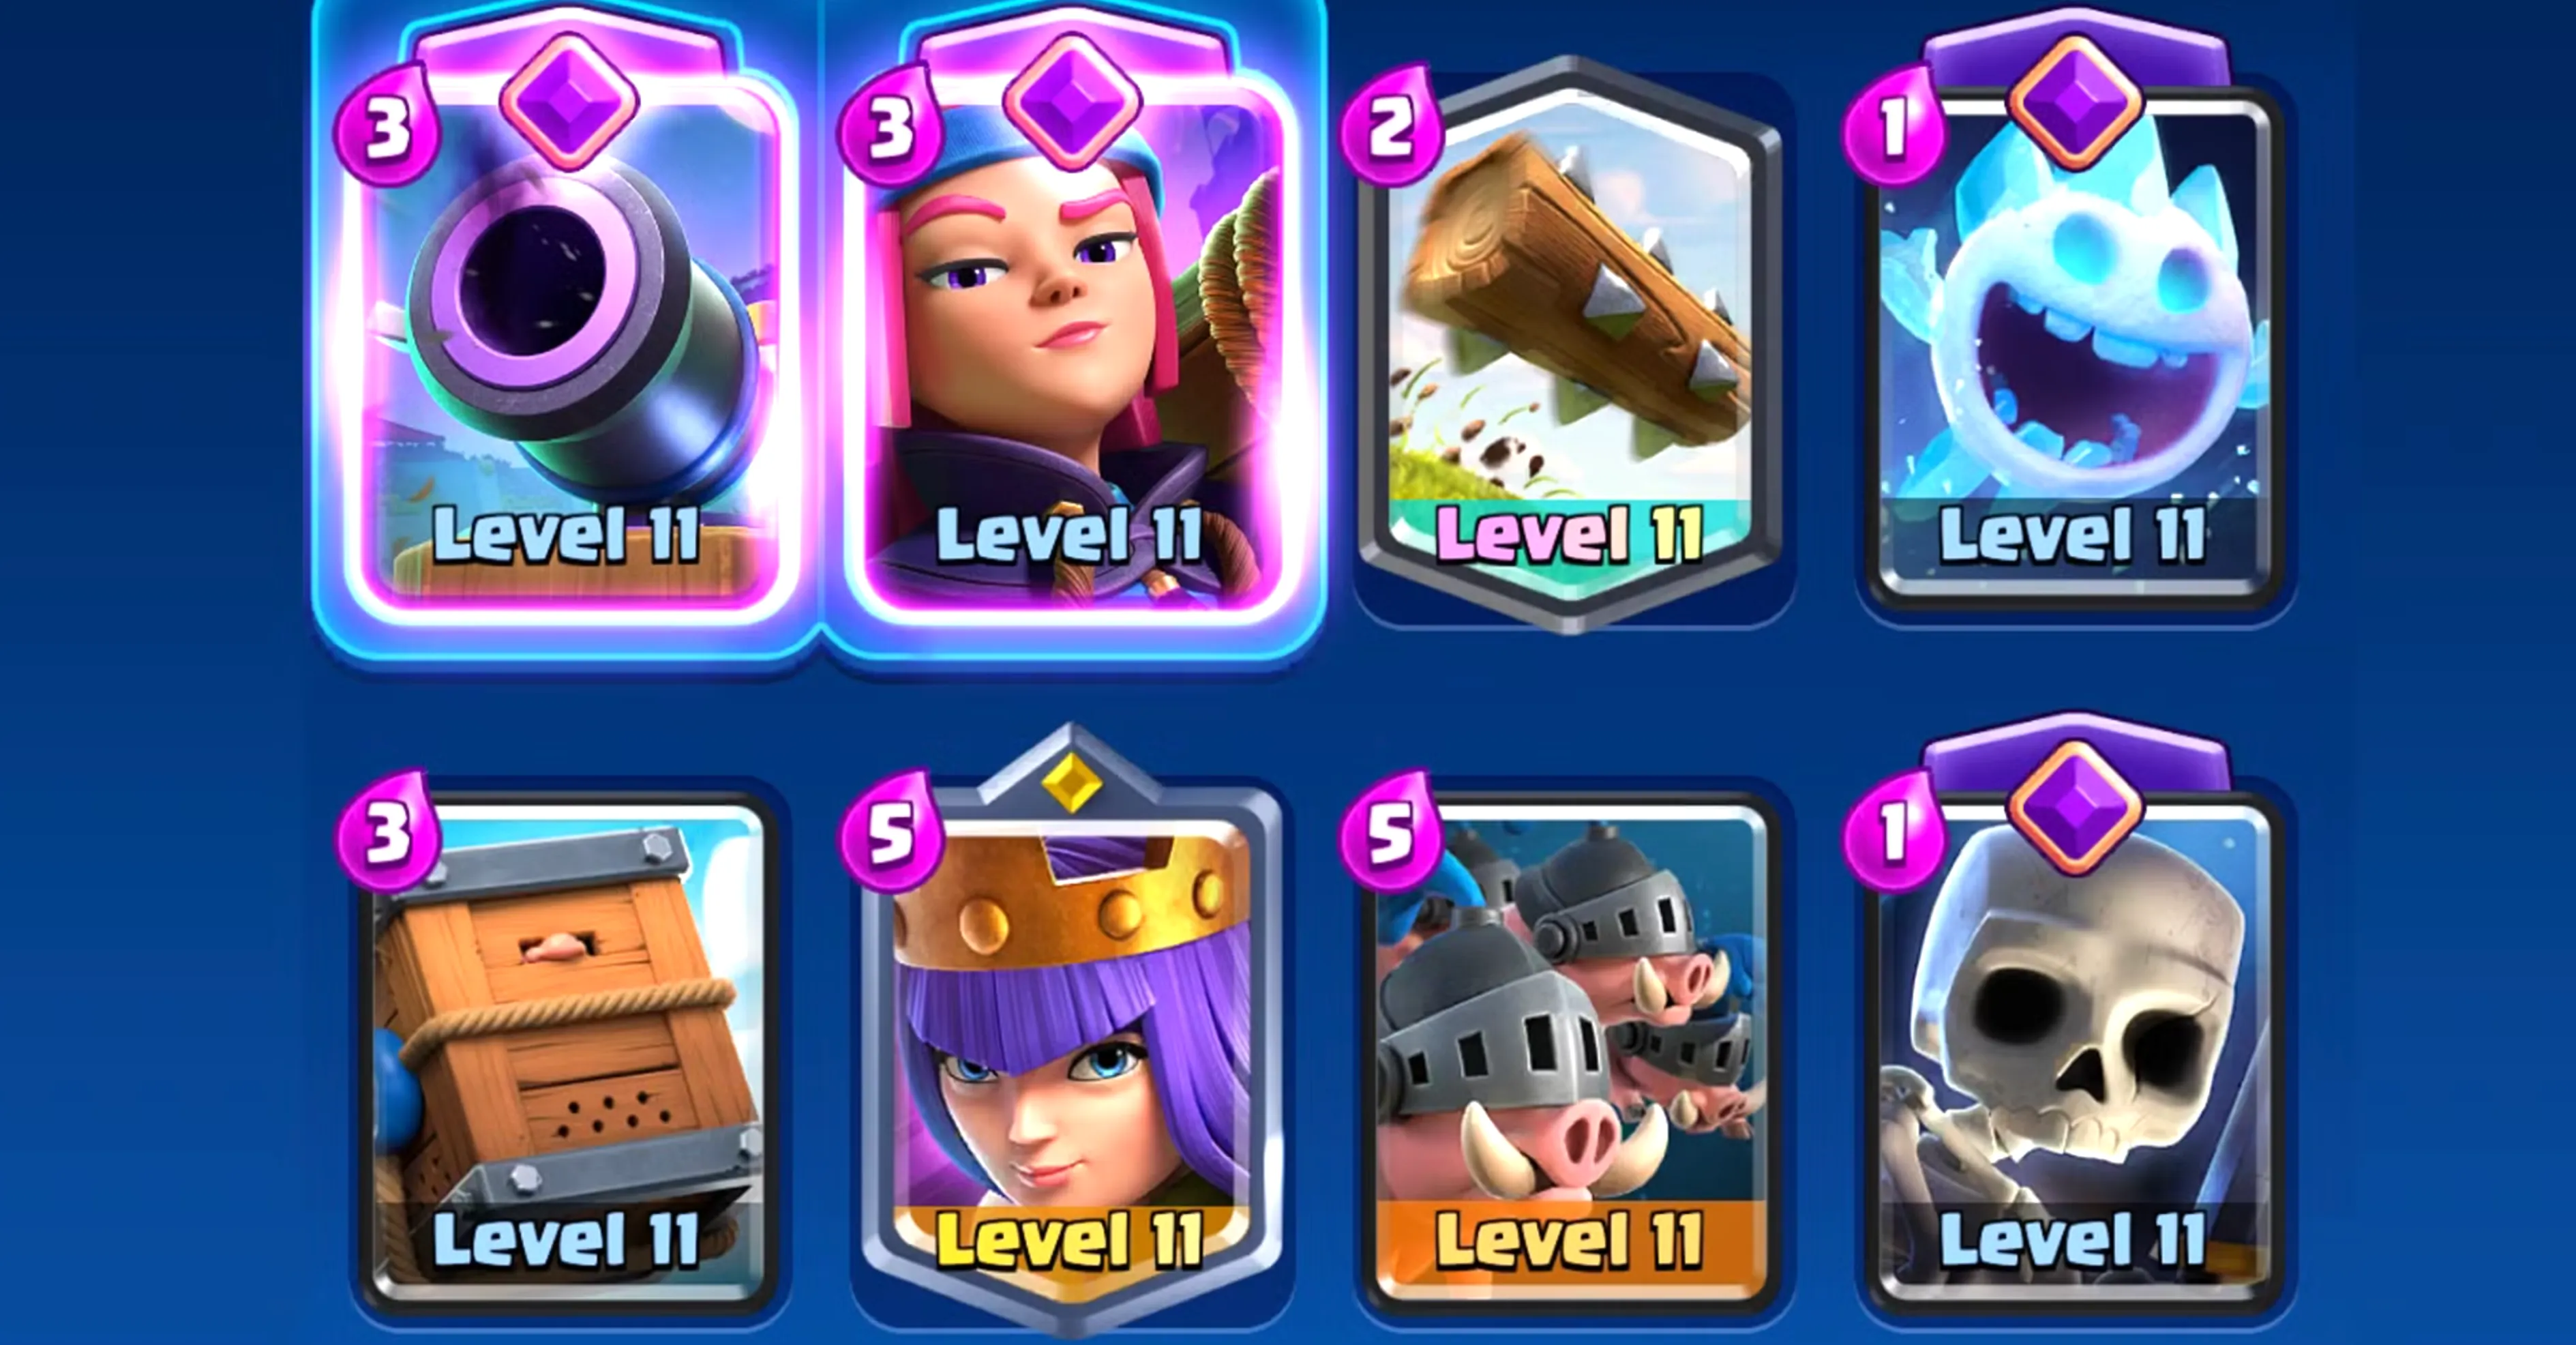
Average Elixir Cost: 2.9
• Cannon Evolution (3 Elixir)
• Firecracker Evolution (3 Elixir)
• The Log (2 Elixir)
• Ice Spirit (1 Elixir)
• Royal Delivery (3 Elixir)
• Archer Queen (5 Elixir)
• Royal Hogs (5 Elixir)
• Skeletons (1 Elixir)
This deck is all about combining fast cycle cards with two strong win conditions: Archer Queen and Royal Hogs. The Royal Hogs are your main tower-targeting threat, while the Archer Queen works as both a defensive powerhouse and a secondary win condition thanks to her invisibility ability, which allows her to shred tanks or chip away at crown towers. The typical push is simple but effective—place Archer Queen behind your King Tower and send Royal Hogs at the bridge. With an Ice Spirit to support, you’ll often force your opponent to overspend on defense.
Defensively, Firecracker Evolution and Cannon Evolution provide excellent control, with Firecracker also offering counter-push potential if left alive. Royal Delivery and The Log round out your spells, helping clean up swarms and keeping your win conditions alive. With its quick cycle and versatile defensive options, this deck can outlast most opponents while constantly pressuring their towers.
#6: Miner and Poison Deck
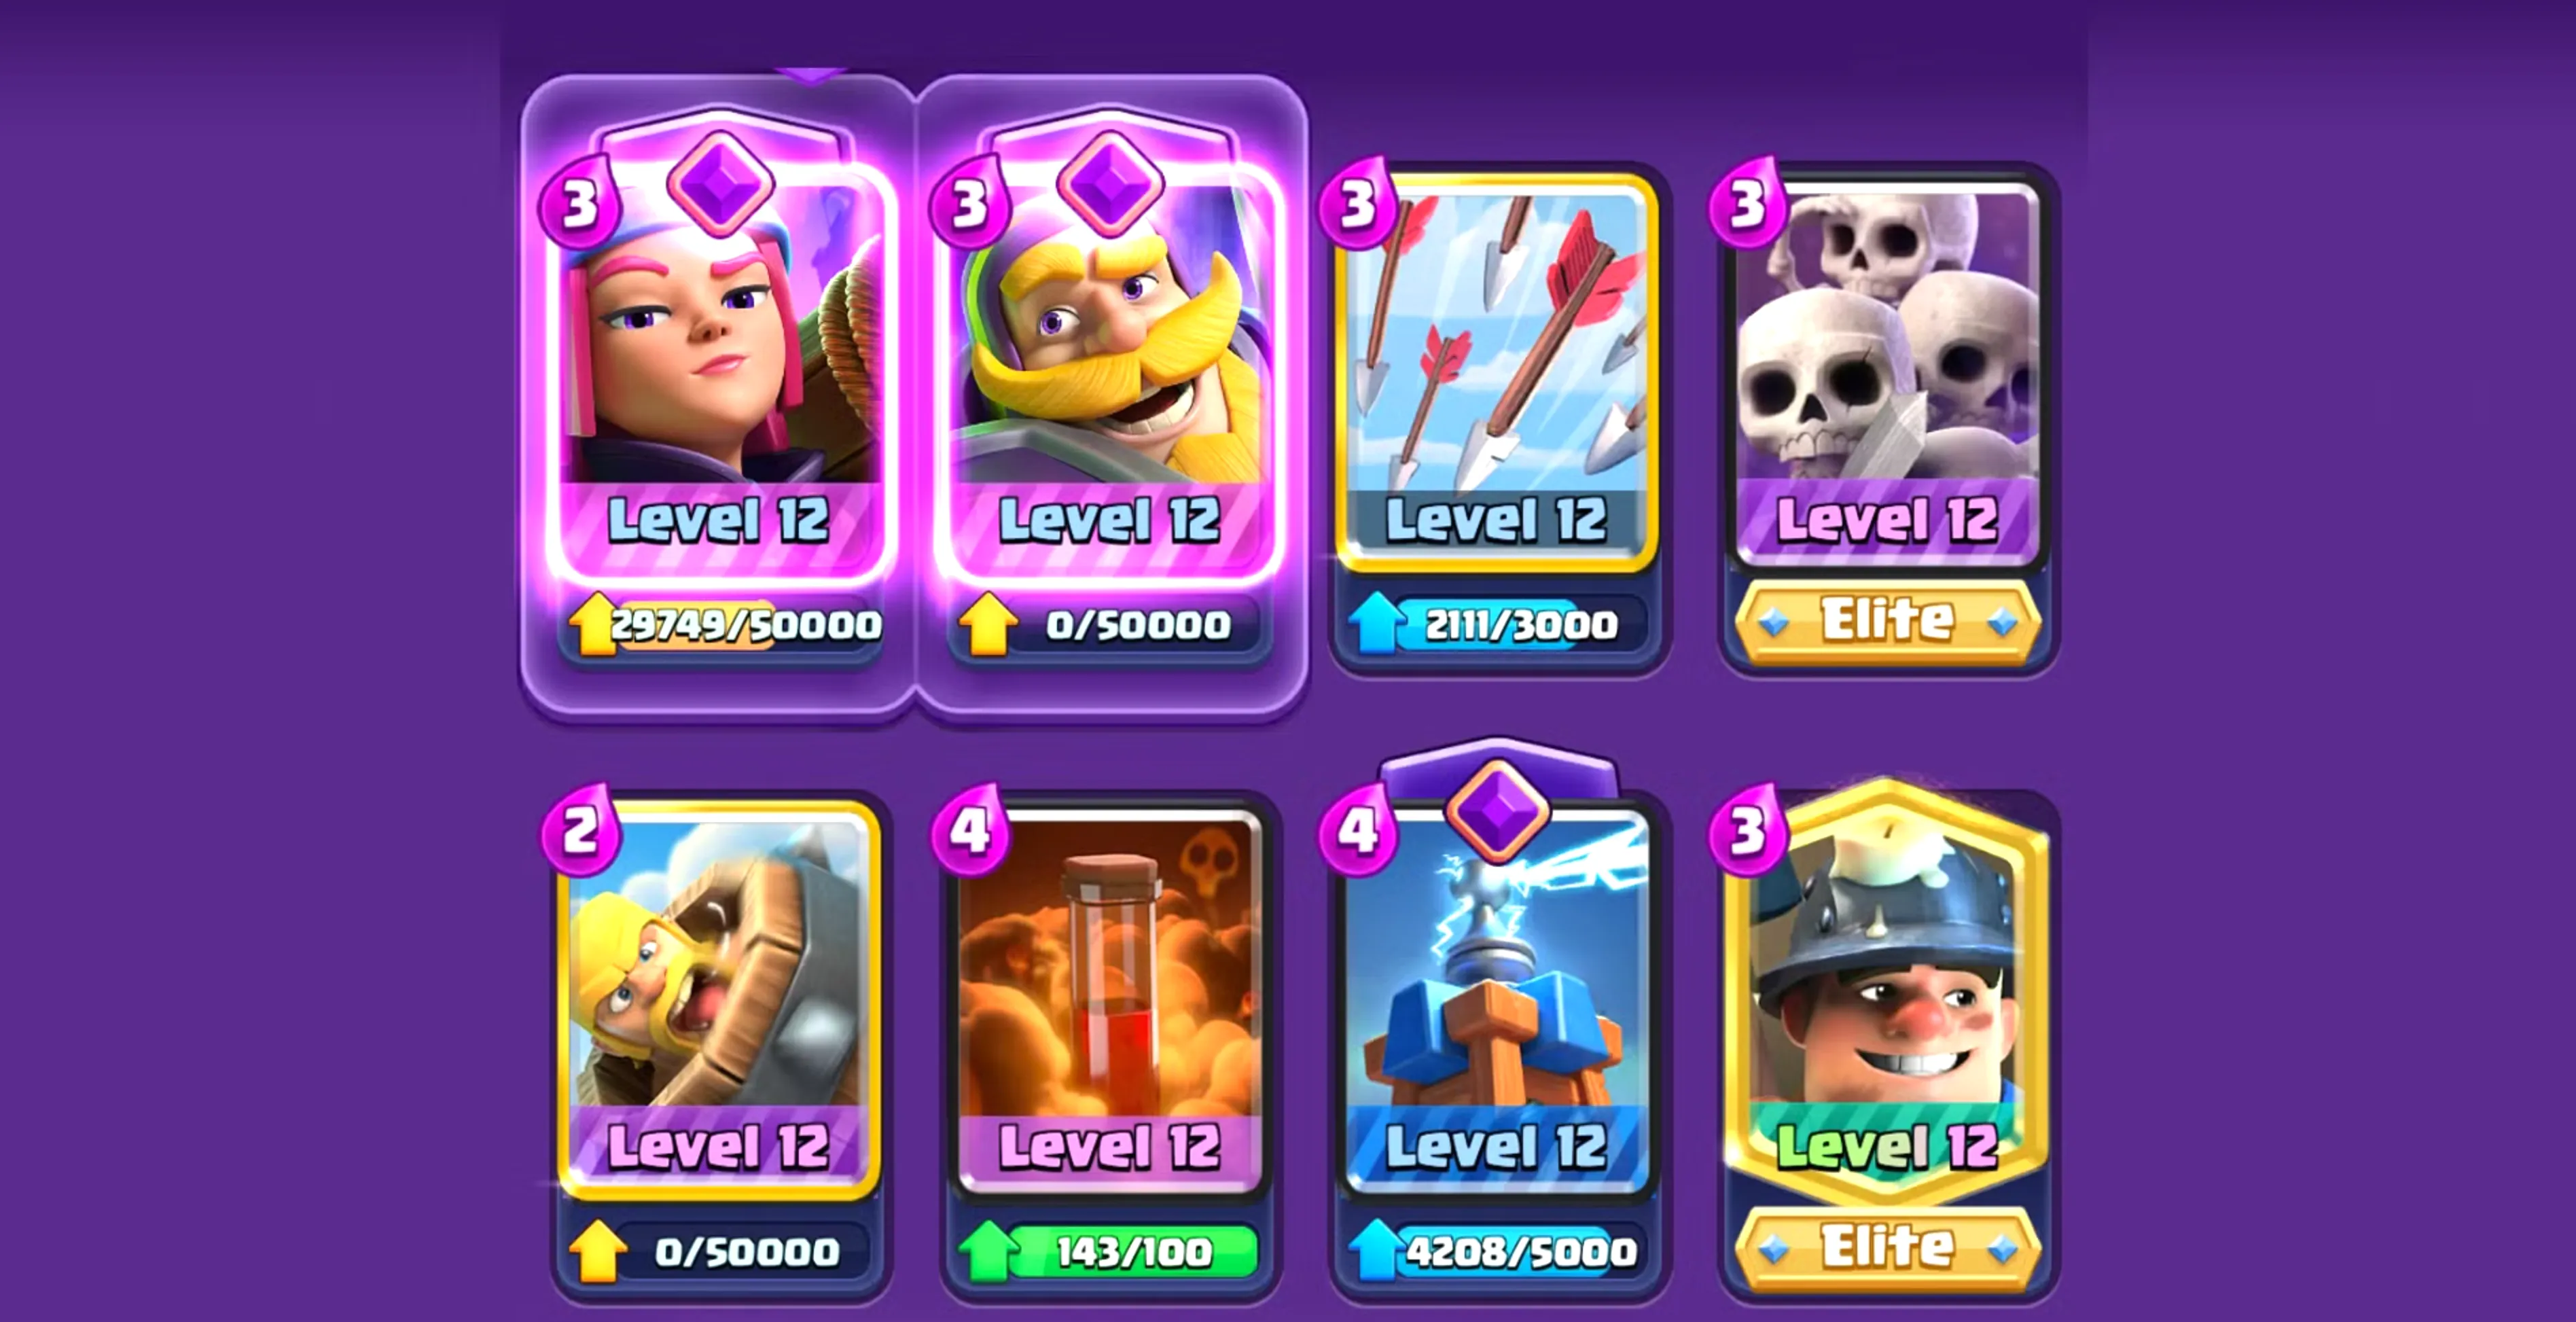
Average Elixir Cost: 3.1
• Firecracker Evolution (3 Elixir)
• Knight Evolution (3 Elixir)
• Arrows (3 Elixir)
• Skeleton Army (3 Elixir)
• Barbarian Barrel (2 Elixir)
• Poison (4 Elixir)
• Tesla (4 Elixir)
• Miner (3 Elixir)
This classic control deck focuses on steady chip damage with the Miner and Poison combo. The idea is simple—send the Miner onto the opponent’s tower while dropping Poison to cover defending troops and buildings. Over time, the continuous chip damage starts to add up, giving you a reliable win condition that’s hard to stop. The Poison’s value really shines when you use it on both the tower and enemy support units, maximizing its cost efficiency.
For defense, Tesla and Knight Evolution provide stability against tanks, while Firecracker Evolution handles swarms and gives strong counter-push potential. Arrows and Barbarian Barrel give you cheap, flexible answers to Goblin Barrel, Skeleton Army, and other swarm threats. In double elixir, you can ramp up the pressure by pairing Miner and Poison pushes with quick support from Firecracker or Knight at the bridge, forcing your opponent to overspend on defense.
This deck rewards patience and careful elixir management, making it a strong choice for players who prefer to slowly chip down opponents while maintaining solid defensive control.
#5: Valkyrie and Goblin Barrel Deck
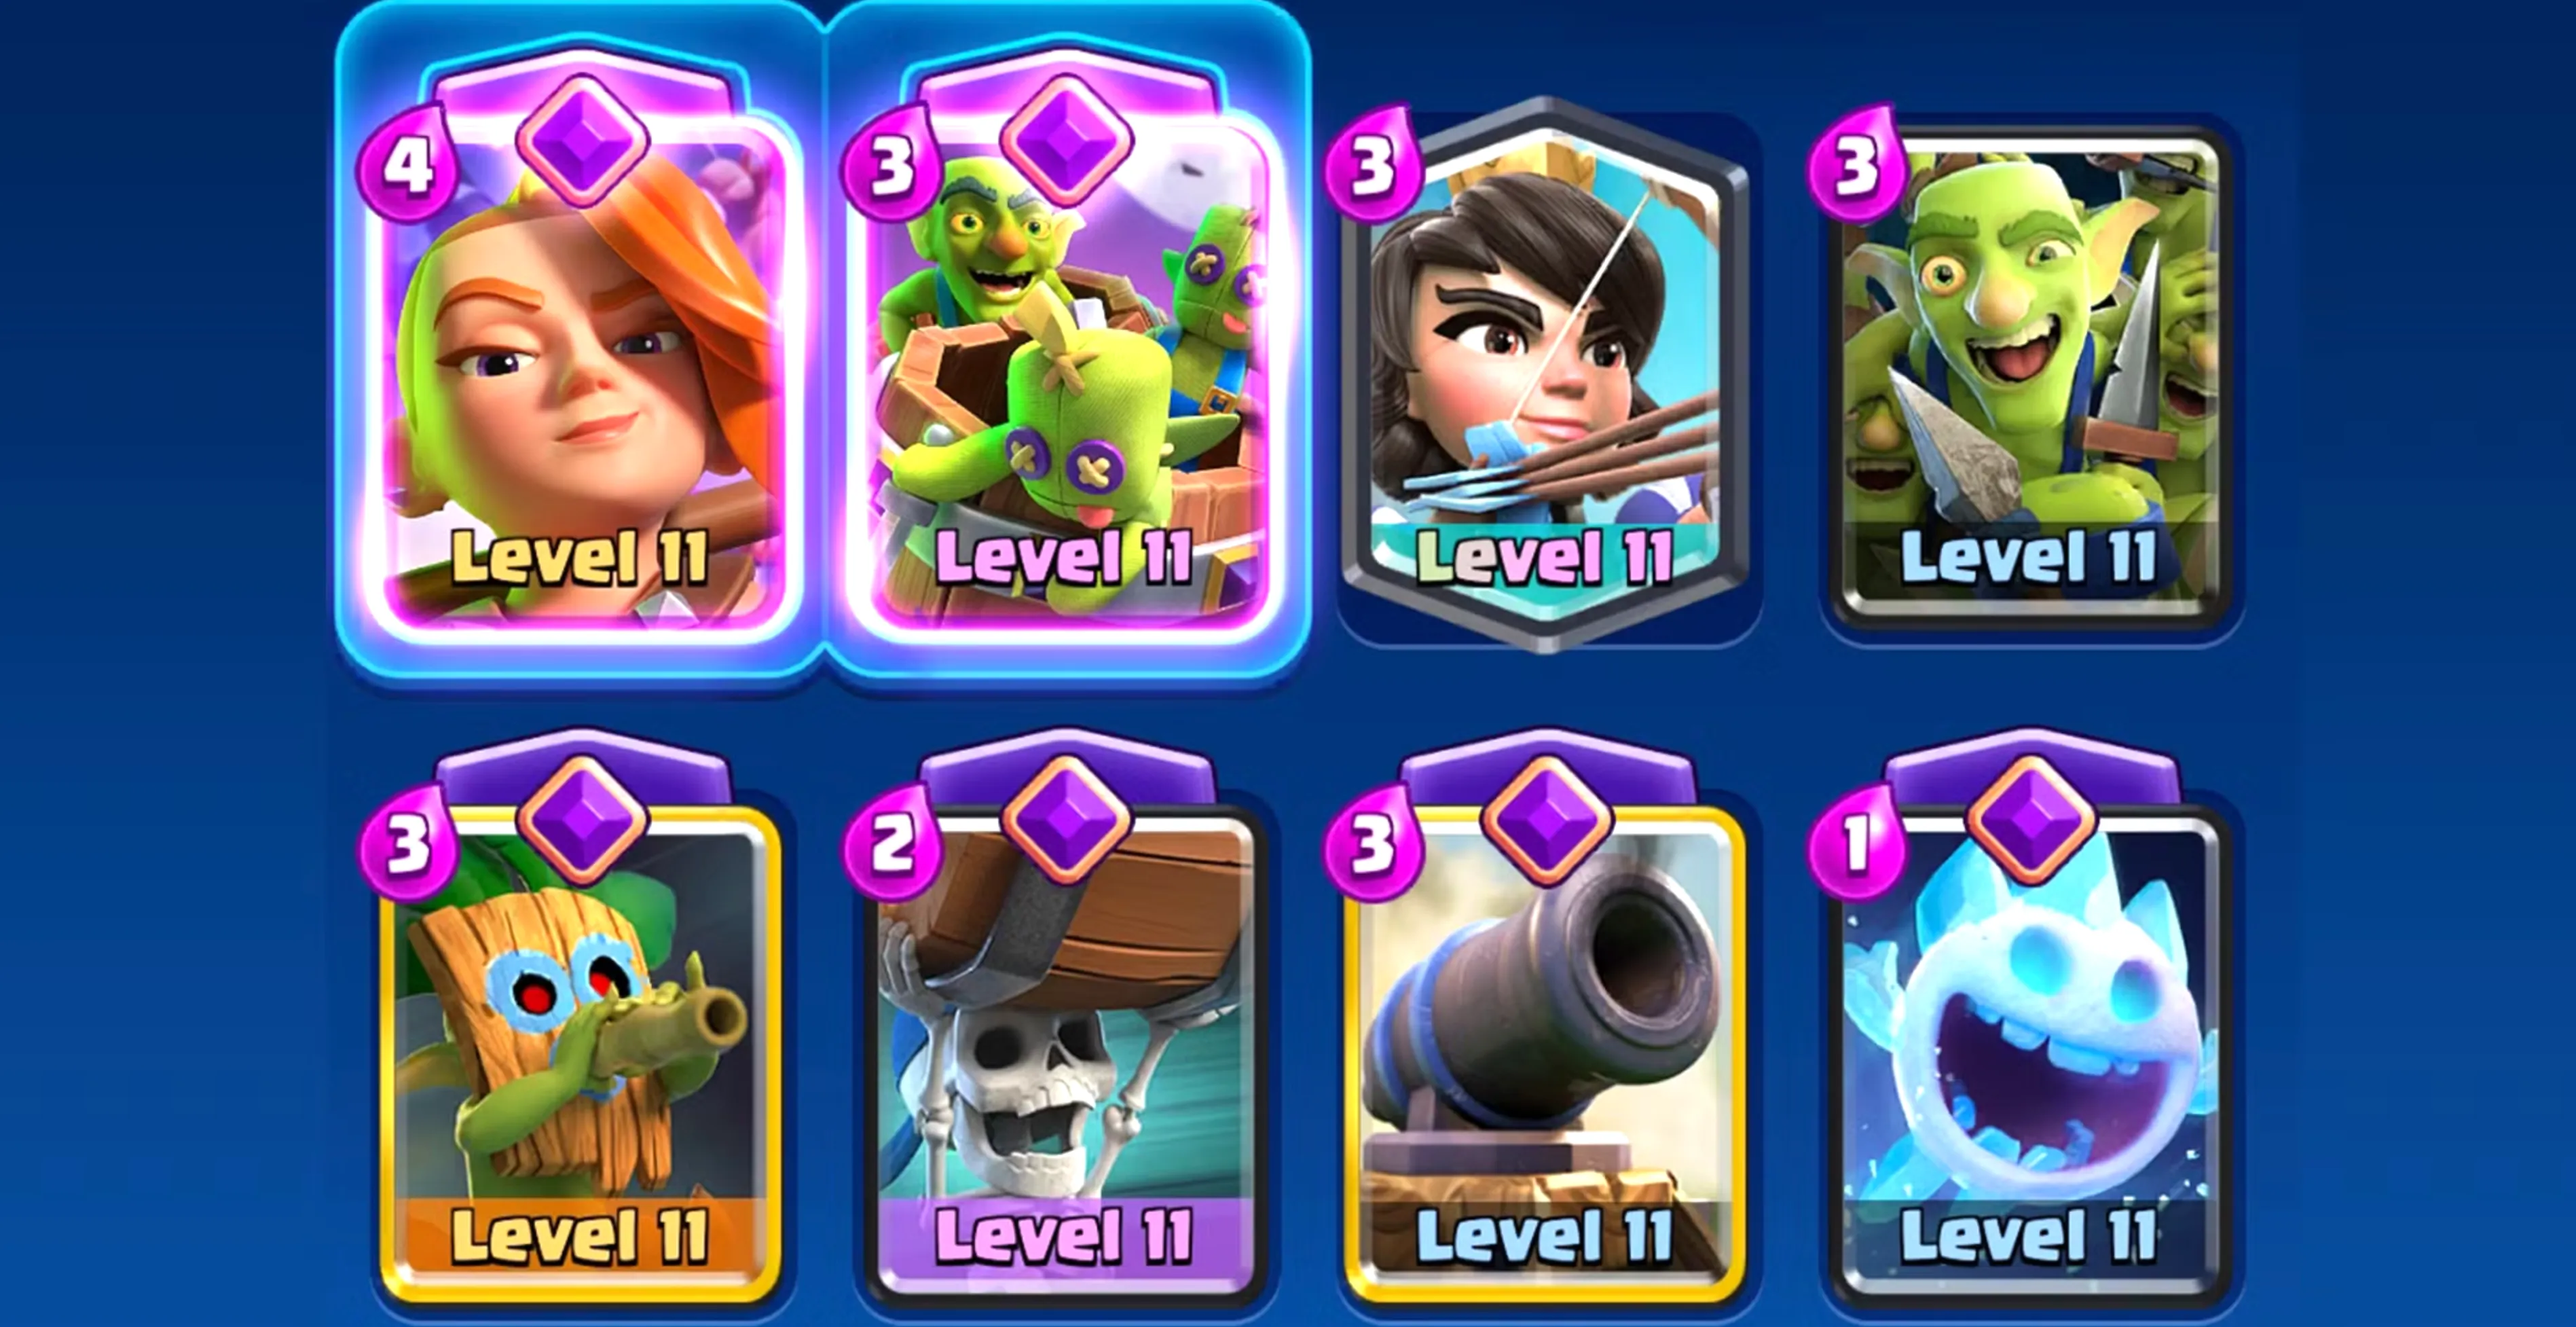
Average Elixir Cost: 2.8
• Valkyrie Evolution (4 Elixir)
• Goblin Barrel Evolution (3 Elixir)
• Princess (3 Elixir)
• Goblin Gang (3 Elixir)
• Dart Goblin (3 Elixir)
• Wall Breakers (2 Elixir)
• Cannon (3 Elixir)
• Ice Spirit (1 Elixir)
This deck is all about non-stop pressure with fast cycle cards and tricky win conditions. Valkyrie Evolution is your anchor on defense, capable of wiping out swarms and standing up to heavy pushes while still being a solid threat when she turns offensive. Her splash damage makes her a nightmare for ground units, and with her evolved form, she can even handle some air troops.
Your main damage source here is the Goblin Barrel, which should be thrown whenever you know the opponent’s small spells are out of rotation. Wall Breakers give you another quick way to chip towers, while Princess and Dart Goblin apply long-range pressure and force your opponent to spend elixir constantly. Goblin Gang and Ice Spirit keep your cycle cheap and flexible, while Cannon provides reliable defense against tanks.
The key to success with this deck is patience and baiting. Don’t drop all your support cards at once—instead, stagger them to drain your opponent’s counters. Once their spells are gone, your Goblin Barrel and Wall Breakers will become nearly unstoppable. This makes the Valkyrie and Goblin Barrel deck one of the most effective low-cost bait strategies in Clash Royale.
#4: Firecracker and Giant Deck

Average Elixir Cost: 3.0
• Firecracker Evolution (3 Elixir)
• Knight Evolution (3 Elixir)
• Cannon (3 Elixir)
• Giant (5 Elixir)
• Bomber (2 Elixir)
• Bats (2 Elixir)
• Skeleton Army (3 Elixir)
• Arrows (3 Elixir)
This deck sticks to the fundamentals with Giant as your main win condition, supported by a mix of cheap cycle cards and splash damage troops. The goal is simple: drop the Giant at the bridge or in the back, then stack support troops like Firecracker, Bomber, and Bats behind him to create nonstop pressure. Firecracker is especially effective here, clearing swarms from a distance while the Giant pushes forward.
On defense, Knight and Cannon handle most threats, with Knight acting as a mini-tank to soak hits. Skeleton Army is your best counter to single-target damage dealers or enemy tanks, while Arrows make quick work of swarm units that could otherwise overwhelm your push.
The deck works best when you play patiently—defend first, then turn your defense into a counterpush behind the Giant. If you manage your elixir carefully and keep Firecracker alive, your opponent will quickly run out of answers, allowing your Giant to lock onto the tower and deal heavy damage.
#3: Miner and Royal Ghost Deck

Average Elixir Cost: 3.0
• Firecracker Evolution (3 Elixir)
• Tesla (4 Elixir)
• Miner (3 Elixir)
• Knight (3 Elixir)
• Minions (3 Elixir)
• Barbarian Barrel (2 Elixir)
• Royal Ghost (3 Elixir)
• Arrows (3 Elixir)
This variation swaps out Poison for the Royal Ghost, giving the deck a different style of offense. Instead of relying on slow chip damage over time, the Royal Ghost delivers strong, direct hits that pair perfectly with Miner. The Ghost’s invisibility also makes him tricky for opponents to deal with, forcing them to waste elixir or misplace defensive cards.
The addition of Minions instead of Skeleton Army makes this version safer against light spells like Zap, giving you more reliable air defense. Firecracker continues to provide great splash support, while Tesla and Knight handle most defensive duties. Arrows and Barbarian Barrel round out the deck, making it easier to clear swarms and keep your pushes alive.
Overall, this deck plays faster than the Miner + Poison setup. It doesn’t guarantee the same chip damage every push, but the higher burst potential from Royal Ghost makes it especially dangerous when your opponent is low on elixir or misplays their defense.
#2: Pekka and Rune Giant Deck
Average Elixir Cost: 3.4
• Firecracker Evolution (3 Elixir)
• Pekka Evolution (7 Elixir)
• Rune Giant (4 Elixir)
• Arrows (3 Elixir)
• Knight (3 Elixir)
• Barbarian Barrel (2 Elixir)
• Miner (3 Elixir)
• Bats (2 Elixir)
This deck blends two heavy hitters, Rune Giant and Pekka, into a versatile setup that can pressure opponents in multiple ways. Rune Giant is the centerpiece, turning nearly any unit into a deadly threat when supported properly. Pairing him with Pekka creates a powerful frontline that’s tough to stop, while Firecracker sits safely in the back, wiping out swarms and softening enemy defenses.
Miner adds a cheap win condition and can chip away at towers or distract defenses while Rune Giant moves in. Knight and Bats provide solid defensive coverage, with the Knight absorbing damage and the Bats handling air threats. To round things out, Arrows and Barbarian Barrel ensure you can clear small troops quickly and keep your pushes alive.
The beauty of this deck is its flexibility—you’re not locked into a single push. You can go all-in with Rune Giant and Pekka, or mix things up with Miner + Knight for lighter pressure. That adaptability makes this deck a strong choice for both offense and defense in today’s meta.
#1: Hog Cycle Deck
Average Elixir Cost: 2.6
• Skeletons Evolution (1 Elixir)
• Ice Spirit Evolution (1 Elixir)
• Ice Golem (2 Elixir)
• Musketeer (4 Elixir)
• Hog Rider (4 Elixir)
• Cannon (3 Elixir)
• Fireball (4 Elixir)
• The Log (2 Elixir)
The Hog Cycle remains the king of low-cost decks in Clash Royale thanks to its speed, pressure, and consistency. With an average cost of just 2.6 Elixir, this setup allows you to cycle through cards faster than your opponent, keeping constant pressure on their towers. The Hog Rider is your main win condition, and by pairing him with The Log or Fireball, you can clear out defenses and guarantee tower damage.
On defense, Musketeer and Cannon handle most pushes, while Ice Golem, Skeletons, and Ice Spirit are perfect for distracting and slowing down enemy troops. The key to mastering this deck is learning the timing—knowing when to push with Hog Rider and when to defend. Even though it can struggle in the highest arenas against heavy counters, Hog Cycle is still one of the best decks for Trophy Road and mid-ladder progression because of how fast and relentless it is.
Conclusion
Low-cost decks have always been a fan favorite in Clash Royale because they reward smart plays, quick decision-making, and efficient Elixir use. Whether you prefer the classic Hog Cycle, the control of Miner decks, or the defensive power of Pekka-based builds, each of these decks gives you the tools to climb the ladder without needing expensive cards. The key is mastering timing and cycling so you can outplay your opponent and keep them under constant pressure. If you want to win more matches without breaking the bank on high-Elixir strategies, these low-cost decks are some of the best options to dominate the arena.
Posted On: October 5th, 2025
Recent Articles


💬 Need help?
Our 1v9 support team is available 24/7 to help you with any questions or issues you may have.
support@1v9.gg
Loading...
1v9.gg is not endorsed or affiliated by any game developers or publishers.
2025 1v9, All Rights Reserved, Created By NightDev