- Home
Games
 League of Legends
 Valorant
-a6d5b3e156bb.webp) Fortnite
Fortnite Call of Duty
 Clash of Clans
 Counter-Strike 2
 Roblox
 Rainbow Six Siege
 Clash Royale
 Minecraft
 Rocket League
 Dota 2
 Genshin Impact
 Squad Busters
 Rust
Rust Apex Legends
 Pokemon Go
 XDefiant
 Hay Day
 LoL: Wild Rift
 Diablo 4
 Marvel Rivals
 FC 25
FC 25 Destiny 2
 World of Warcraft
 The Finals
 Deadlock
-9ede9dc6b01b.webp) PUBG Mobile
PUBG Mobile Forza Horizon 5
 Growtopia
 Honkai: Star Rail
 Warframe
 8 Ball Pool
 Zenless Zone Zero
 Runescape 3
 Path of Exile
 Raid: Shadow Legends
 Lost Ark
 WoW: Classic Era
 Summoners War
 WoW: Season of Discovery
 WoW Cataclysm
 WoW: Hardcore
 Throne and Liberty
 Escape From Tarkov
 New World
 Mobile Legends
 Path of Exile 2
 Blade Ball
 Fisch
Fisch Pet Simulator 99
 Pets Go
-d8bcef7708c7.webp) One Piece Bounty
One Piece Bounty Anime Adventures
 Blox Fruits
 Adopt Me
 Murder Mystery 2
 Fragpunk
 Wuthering Waves
 Teamfight Tactics
 Free Fire
 Albion Online
 Black Desert Online
 Brawl Stars
 Honor of Kings
 Arena of Valor
 Call of Duty: Mobile
 Rematch
 Steal a Brainrot
 Grow a Garden
 FC 26
FC 26 Old School Runescape
 Plants vs Brainrots
 Overwatch
 Battlefield
 Arc Raiders
 Dragon Ball Legends
 Fallout 76
 Jailbreak
 Type Soul
 GPO
GPO DonutSMP
 Escape Tsunami For Brainrots
 Watcher of Realms
 Roblox Rivals
 2XKO
2XKO Sailor Piece
 Forza Horizon 6
 GT45
GT45- Lootboxes
- Become Affiliate
- Blog
- Contact Us
- Sign In


Valorant: 6 Best Brimstone Smokes For Fracture
Fracture is one of Valorant’s most unique maps, with its distinctive split design featuring two attacker spawns and a layout that mixes industrial landscapes with untamed nature. The map’s fragmented structure, caused by the experiments of the sophisticated agent Chamber, forces players to remain hyper-aware of rotations and map control to secure victory.
As a Controller, your role on Fracture is crucial. The map’s layout demands careful consideration of multiple entry points, sightlines, and rotation paths. Brimstone, with his three flexible smokes, is perfectly equipped to adapt to this dynamic environment. His smokes not only protect your team but also effectively deny enemies valuable map space.
In this guide, we’ll break down the six most effective smoke placements for Brimstone on Fracture, helping you take control of the map and lead your team to victory. Let’s get started!
#6: Securing B Site on Defense
A solid defensive setup for B Site often involves one player holding Tower to monitor Arcade, while one or two teammates focus on B Main. As Brimstone, your objective is to cut off entry points from both directions and slow the attackers’ push.
Drop your first smoke on B Main, covering the stairs that lead onto the site, and place the second smoke at the Arcade connector to block sightlines from that angle. This setup forces attackers approaching Arcade to funnel toward Tower, where the close-range engagement angles give defenders the advantage.
Meanwhile, attackers coming through B Main will be delayed by your smoke and can be further stopped with a well-timed Molotov, disrupting their advance and giving your team more control over the site. This setup maximizes your ability to delay and contain enemy movements, setting up your team for a strong defense.
#5: Attacking B Site Effectively
When attacking B Site on Fracture, a coordinated approach from both sides of the map is often the most effective strategy. Splitting your push ensures greater map control, divides the defenders’ attention, and allows for easier rotations if needed. To support this strategy, your smokes should be placed to block defenders without hindering your teammates’ sightlines.
The ideal smoke placements for B Site are at Generator and Canteen, as these are the primary spots where defenders will hold or rotate through. Avoid placing a smoke on Tower, as this can backfire by giving defenders an opportunity to lurk close to your team during the Spike plant. Instead, prioritize clearing Tower completely to eliminate threats and secure your team’s position.
By thoughtfully placing your smokes and coordinating with your team, you can create a safer environment to take B Site and set up a strong post-plant defense.
#4: Strategically Attacking A Site
Attacking A Site on Fracture offers flexibility, as your team can approach from both A Main and Dish. However, A Main presents a unique challenge with the presence of Door, which provides an additional path onto the site. If your team chooses to push through A Main without utilizing Door, your smokes should focus on blocking Defender Spawn, Sand, and Drop to limit enemy visibility and rotation paths.
If your team opts for a split push that includes Dish, you can forgo the Drop smoke initially and save it for a potential retake scenario. A split push is highly effective for overwhelming defenders, applying pressure from multiple angles, and leaving them with limited options to hold the site.
By coordinating smokes and adjusting your strategy based on your team’s approach, you can maximize your chances of securing A Site and outmaneuvering the defenders.
#3: Locking Down A Site on Defense
Defending A Site on Fracture is relatively straightforward when using Brimstone’s utility. The Door near A Main acts as a natural barrier for teammates holding Rope, so your primary focus should be dropping a smoke at the Main entryway. Following up with a Molotov can make it significantly harder for attackers to push onto the site.
If attackers are quickly overwhelming Rope by rushing through Door, adapt your defense by placing a smoke on Sand. This defensive adjustment mirrors an attacker’s smoke and provides additional coverage to slow their advance, giving your team crucial time to rotate and regroup.
Always keep an eye on Dish, as it’s a key angle that can leave the site exposed. If your teammates aren’t covering it or are eliminated, deploy a smoke on Drop to secure your backline and prevent attackers from flanking. By proactively adapting your smokes to the situation, you can hold A Site effectively and disrupt the attackers’ momentum.
#2: Defending the B Site Orb

Ultimate Orbs are invaluable resources, granting one free ultimate point to the agent who secures them. On Fracture, where there are four Orbs available, controlling these resources becomes even more important. As a defender, contesting the B Site Orb is an effective way to deny attackers space and disrupt their strategy.
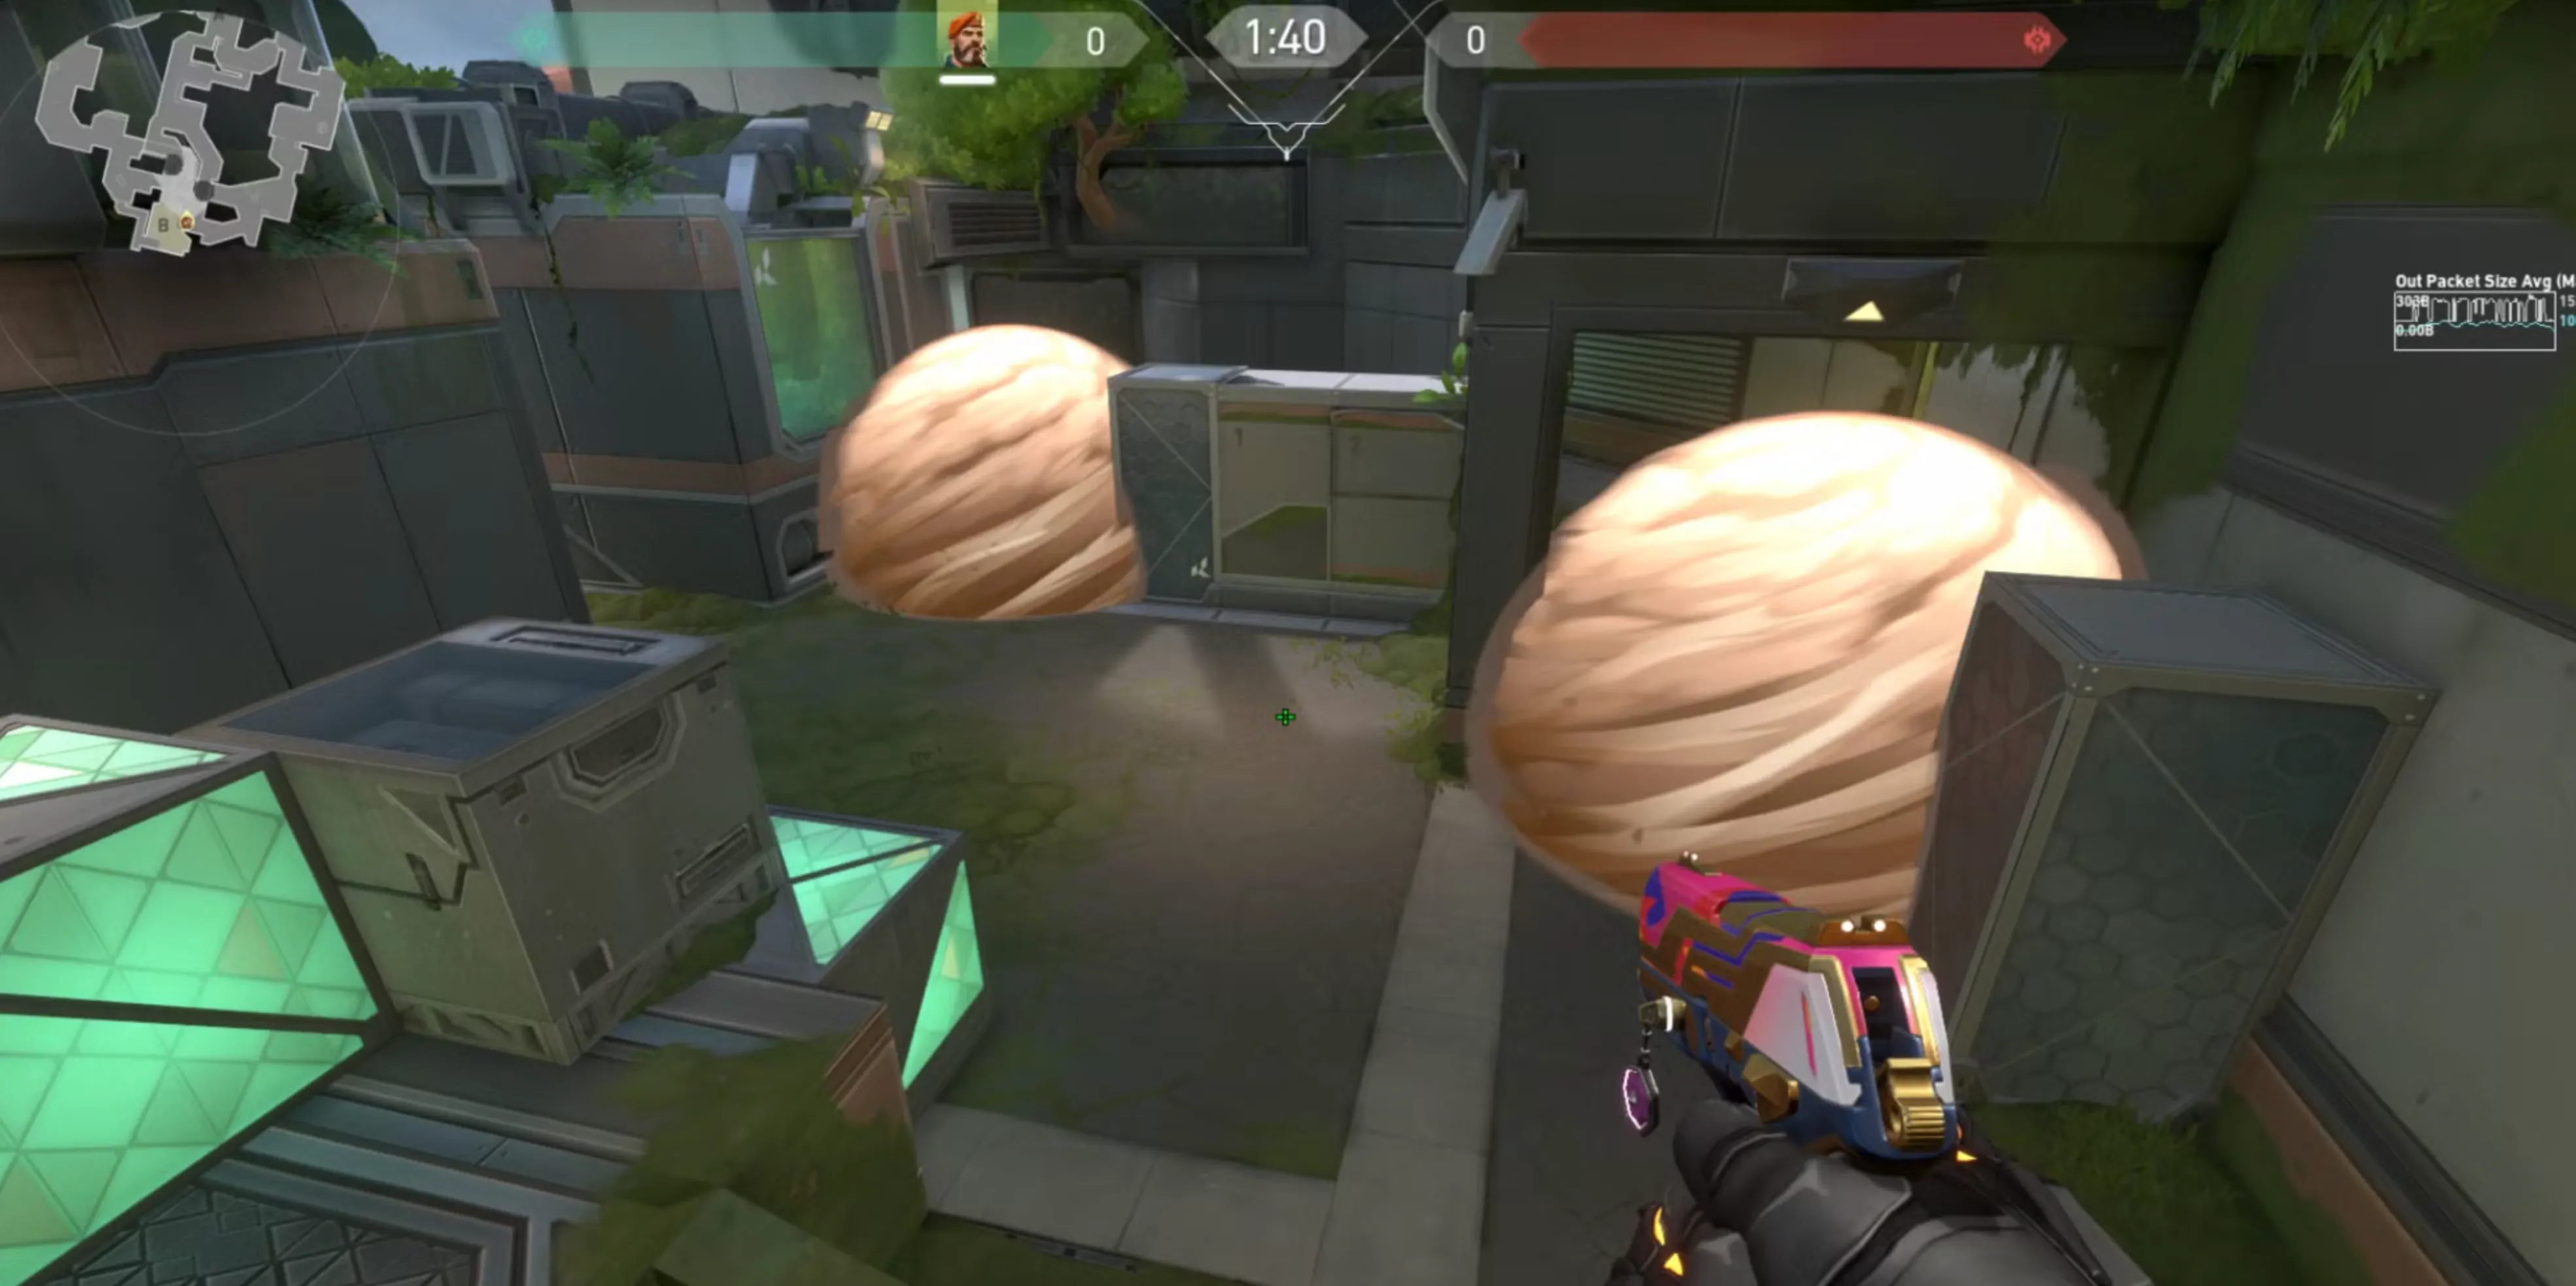
Deploy your smoke near Tree, positioning it snugly between the two metal structures on the map. This placement blocks attackers’ visibility and forces them to push directly through the smoke if they want to contest the Orb. Pair this setup with a Duelist who can capitalize on the space created by your smoke, taking aggressive control of the area.
The solid coverage of Brimstone’s smoke ensures attackers cannot safely retrieve the Orb, giving your team an edge over anyone who attempts to peek. By combining utility and teamwork, you can dominate the B Site Orb and maintain map control.
#1: Controlling the A Site Orb on Defense
Securing the Ultimate Orb on A Site is just as critical as controlling the one on B. At the start of the round, place a smoke deep into A Main to block attackers’ sightlines and limit their ability to safely contest the area. Coordinate with a teammate to hold defensive positions around the smoke, creating a strong presence that forces attackers to expend significant utility if they want to regain control.
If the attackers shift their focus elsewhere on the map, capitalize on their retreat by claiming the Orb for your team. Securing it early puts you one step closer to unleashing your ultimate ability, turning the tide of the match in your favor. With effective teamwork and utility placement, you can consistently dominate the A Site Orb and maintain control of this key resource.
Conclusion
Mastering Brimstone’s smokes on Fracture is essential for controlling the map and giving your team a strategic advantage. With its unique design and split attacker spawns, Fracture demands precise utility usage to manage rotations, block key sightlines, and secure valuable resources like Ultimate Orbs.
By implementing these six powerful smoke setups, you can dominate both attacking and defending scenarios, ensuring your team has the upper hand in every round. Brimstone’s adaptability and map-wide utility make him a perfect fit for Fracture, allowing you to execute plays, delay pushes, and secure victories. Practice these placements, communicate with your teammates, and lead your team to success on this dynamic map.
Posted On: January 30th, 2025
Recent Articles


💬 Need help?
Our 1v9 support team is available 24/7 to help you with any questions or issues you may have.
support@1v9.gg
Loading...
1v9.gg is not endorsed or affiliated by any game developers or publishers.
2025 1v9, All Rights Reserved, Created By NightDev